Sunday, June 29, 2008

Digital Image Noise Reduction - Take Two

In an earlier post I talked about infrared imaging with the Canon A650 IS, and also discussed noise reduction in a digital image through image stacking. Unfortunately I wasn't all that careful with my technique, and as one reader rightly pointed out, the stacked image was blurrier than the original I used for the side-by-side.

In a word: DOH!

So I set up the test again. This time I skipped the whole infrared thing since to some extent it only confuses the issue. This technique should work on visible light images, too. I also skipped the whole black and white thing since this should work on color images as well as it works on B&W ones. I also skipped hand-holding the camera since I had my tripod with me this time!

So without further ado, here's the second attempt at image stacking to improve noise characteristics in an image...

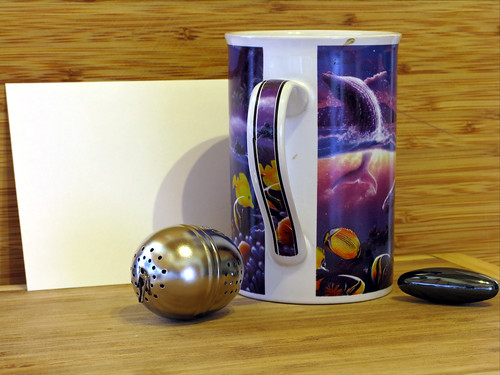
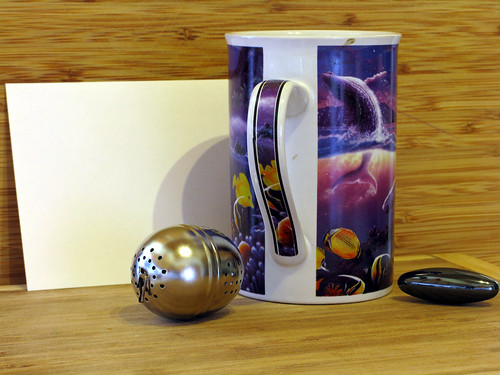
I started with a pretty bland setup in my kitchen: Two cutting boards, one mug (I know... it's dirty), one magnet, one tea ball, and an index card. With my camera mounted firmly to a tripod, and with a self-timer and intervalometer all set up, I took ten "identical" images. Each was shot at something like f/4.6 for 2 seconds at ISO 80. By default the A650 IS also subtracts a dark image from any image longer than 1 second, so thermal noise should largely be removed. Readout noise is pretty minimal for this camera, so most of what's left is photon noise.

A quick note: All the photographs in this article are clickable, and all of them were uploaded to Flickr at full resolution. For the full image shots, that's 4000x3000, so you have to view them at original size in order to see the noise. For the side-by-side shots that's 2000x1000, so you still have to view them at original size to see the noise. Have fun!


DINR - One from the Sequence


That's the final image in the sequence of ten. Except for the utter blandness of the shot, it looks pretty good! Aaaaah, but if you look closely in the shadows, in the smooth areas of white, and around highlights on the metal bits, it's pretty clear there's a fair bit of noise.

So what happens if you stack ten separate images of the same scene? Turns out, something pretty neat:


DINR - Stacked


Same scene, same lighting, same everything. But the noise is reduced by a lot. Still, there's nothing like a side-by-side to compare.

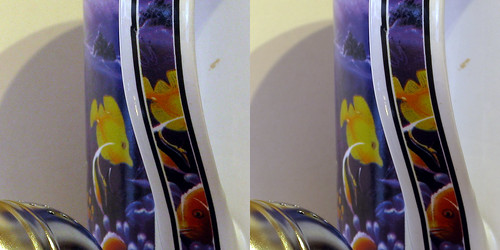
In this first one, take a look at the index card and at the white parts of the mug. The last image from the sequence is on the left, and the stacked image is on the right. The difference in noise level is pretty striking. Also take a look at the silk screen pattern on the mug handle. (Ignore the break in the printing... I didn't print it.) The pattern isn't muddied at all by this technique.


DINR - Side-by-side #1


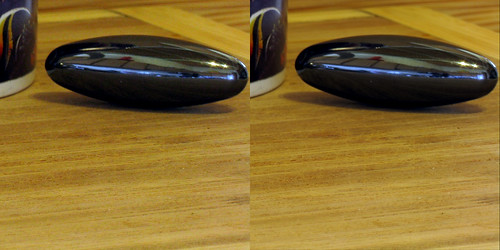
In this second one, take a look at the noise in the wood grain and in the reflections on the magnet. There is a fingerprint on the magnet, which is preserved in both shots. Again, the difference is pretty striking.


DINR - Side-by-side #2


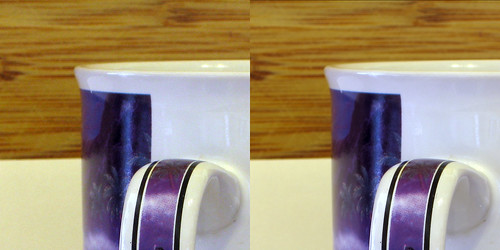
In this last one, again look at the white areas on the mug and the index card. There's still a fair bit of texture on the index card in the stacked image. But if you look closely you can see it's just the normal surface texture of an index card, pretty accurately rendered. Almost all the photographic noise is gone. Also, the silk screen pattern is clearly not muddied by this process.


DINR - Side-by-side #3


So it really does work! And it works even better if the photographer doing it is a little more careful about technique, and doesn't use fuzzy images in the stack. (DOH!)

What's more, the resulting image will have a lot more information in it than any of the originals. A normal JPG image has 8-bits per pixel for a max value of 256 per color per pixel. I used ten images in this stack, so my max value is 2560 per color per pixel. That's roughly 11 bits of information. Lots of room for gamma correction and filtering without introducing artifacts!

One last note before I leave this topic: This is not HDR. The images were all taken using the same settings. Also, I used JPG images rather than RAW. No reason not to use RAW, but there's no need to, either. Any camera can do this. Any photographer can do this. I'm not sure every photographer would want to, but they could if noise was an issue for them.

Tom

Varying Tastes (or... The Oddness of Explore)

An important point for any photographer to remember is that you really can't predict what other people will like. The only thing you have any say in is what you like. I often lose sight of this as I post pictures on Flickr, Etsy, and Zazzle. I post what I like, then I get surprised, and yeah, sometimes hurt, when other people don't share my viewpoint.

I recently discovered a tool that's apparently been around for a long time: Big Huge Labs's Flickr DNA will give you a nice graphical look at what your pictures are doing on Flickr. Which ones are popular, which ones are new, how many, who looks at them, etc. It also tells you which of your pictures have been featured on Explore.

I don't use Explore, so I wasn't even aware that three of my pictures had been there. They don't send you email or give you notice. Your picture just starts getting these odd hits. One picture I wasn't really all that fond of was one of the pictures that had been on Explore. So I asked my wife what was up with that. "I like it!" she told me. Oh...


Dead Tree


This recent hike I took is another good example. This morning I checked for comments, and found a whole slew of comments and favorites on Flying in a Blue Dream (the two swimming honu picutre from my previous post.) Sure 'nuff, it was featured on Explore.

The funny thing is, from that whole set my favorite is the Golden Pools vertical panorama. It was technically challenging, done on purpose, and had what I thought was a really neat set of colors as you move from bottom to top. The honu picture was serendipitous! Utterly unplanned! And cropping it was a bit of a nightmare because it wasn't even composed that way on purpose. (I didn't know the honu was there!)

And yet...

I've wondered this before, and wonder about it even more now: As photographers, I think we get our heads wrapped around an idea, and when we're culling the shots we took that day, we're doing it with that idea firmly in mind. If a picture doesn't fit the mental model, it gets chucked even if it's a perfectly good photograph! I know I do it. I'm guessing others do, too.

So what if a bunch of photographers went out on a shoot together, each with their own mental model of what they want from the day's work, and instead of editing their own photographs, they edit someone else's? Ideally, they'd rotate through everyone's shots, including their own, and put together their "take" on the day. At the end, all the photographers give slide shows to each other, pointing out what they did, why they did it, and whose work it was.

I'm wondering if they'd even use the same set of images!

Tom

Thursday, June 26, 2008

The Long Hike

The hike from Anaeho`omalu Bay to Kiholo Bay didn't happen as planned on Monday, but it did happen on Wednesday. Two days late? I can live with that.

Considering the hike only covered about five miles of distance, as the crow flies, it was much more grueling than I'd expected. Given that I stopped numerous times to do photography or to fly kites for KAP, it took roughly seven hours to go from point A to point B (or K in this case.) I brought 120 oz of water (3.65 l) and plenty of food, and I consumed it all. If reading this makes you think you want to do this hike yourself, be forewarned. It's a toughie.

I launched just south of A-Bay, but because of the early hour the onshore wind from the thermal convection off the lava fields hadn't started yet. So I downed it and switched to my 6' rokkaku.
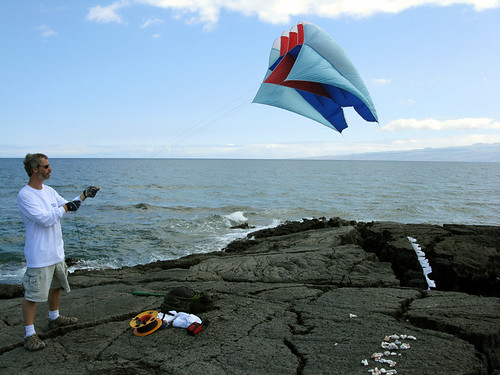

Kiholo Hike Launch


The winds were unstable until around 11am, so most of the shots I took at first were a wash. One of the nagging questions I wanted to answer during this hike was whether a circular polarizer had utility on a KAP rig. The tests I'd done earlier indicated it might not be worth it. The shots came out muddy, I lost half my light to the polarizer, and overall I was a little disappointed. But the volcano was blowing out a lot of gas that day, so I really couldn't be sure. With clear skies and increasingly good winds for flying, I risked it. The results speak for themselves.
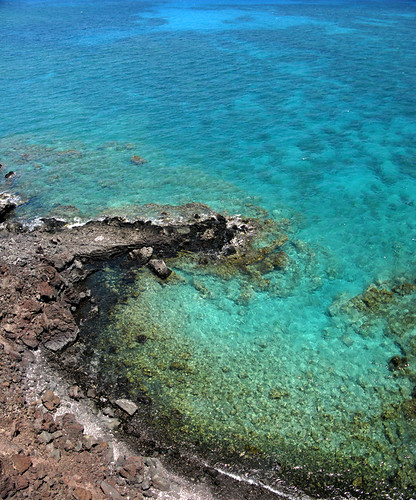

Blue Lagoon


When I saw how well the shots of this bay came out, I left the polarizer on for the remainder of the KAP flights I made during the hike. It really did a good job of cutting sky reflection off the water. The one catch: Polarizers are made to rotate so you can set them against the angle of the sun. I can't touch the polarizer once it's up on the kite. Having some means to secure the polarizer in position would've helped. Chalk this one up to duct tape being a good thing to bring along on a hike!

Just past that bay was the second of several private houses. Private houses typically mean private trees, often very close to the water's edge. Rather than risk losing my kite, I downed my rig, packed everything away, and hiked past. The folks there were very friendly, but I didn't stop to chat.

By the time I passed the house the wind had picked up, so I re-launched my Flowform 16 with a single 3m length of tail, and kept going. I knew that somewhere near there was a place called Golden Pools. But the pools are inland a fair way, and I didn't really want to keep stopping to check out every clump of trees I saw off in the lava. I don't have a video downlink system for my KAP rig, but for recon like this it's just as easy to send the rig aloft, take some pictures, bring it down, and see what can be seen. In this case it paid off.
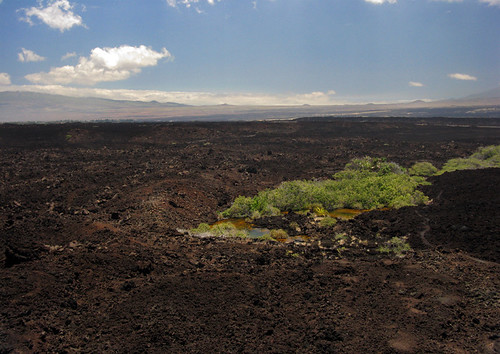

Golden Pools


Not far off was a clump of trees with a curious color at the base! A quarter mile hike across what turned out to be a very good trail brought me to the Golden Pools. Before going out I'd done a fair bit of research, and had seen some pictures of the Pools. But they really didn't do them justice. The colors are amazing, and what I thought was a pond choked with red/brown algae wound up being something else altogether.


Golden Pools - Panorama


The color comes from an organism that lives in a very thin layer coating the rocks in the pools. Deeper parts of the pool aren't covered, so I'm guessing whatever it is it lives off of photosynthesis. The pools are filled with fish that feed off of the gold colored stuff, so whatever it is it's edible. I stopped to take pictures, but I didn't test the waters myself.

Even though the main idea behind the hike was to do kite aerial photography, I also packed along a tripod and my Hoya R72 infrared filter. To be honest most of the hike was incredibly monotone: black lava rock, white coral, dark water, light clouds. An infrared picture would look a lot like a normal black and white. Ah! But the Golden Pools offered something entirely different! Vegetation, and an unknown!
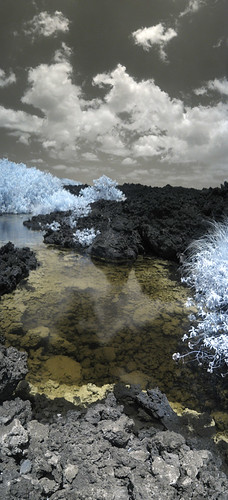

Golden Pools - Infrared Panorama


Just as I'd hoped, the golden organism showed up. Color digital infrared images typically have lots of interesting tones in the image, but it's not a good idea to read too much into them. It's typically residual color bleed, and doesn't indicate a lot about the infrared response of the subject. So I can't tell simply from looking if this means there's chlorophyll in the gold stuff. But it made for a nice picture, anyway.

Just past the Golden Pools was another residence. Past that was one of the most amazing stretches of coastline I've ever seen, with what looked like shallows extending several hundred yards from shore. I hate to say it, but I didn't take a single picture.

The problem with going on a hike like this is that I had a pre-determined pickup time at the end. I had to stick to a schedule of my own making, so finding something serendipitously wonderful like that didn't necessarily mean I was at liberty to stop and take my time with it. I almost cried when I walked past it, especially since the view ahead wasn't all that promising.
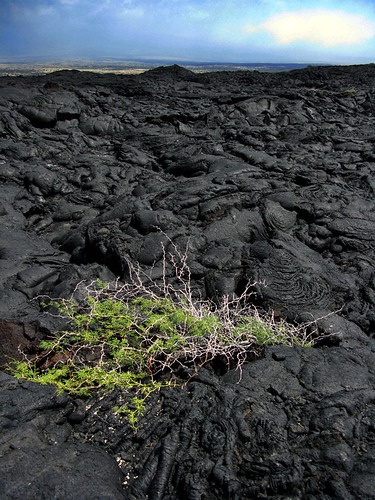

The Long March


Even with all the research I did for the hike, I'd forgotten there was a huge expanse of lava between the last house and Kiholo Bay. It took hours. Rolling pahoehoe lava, long stretches of sea-rounded boulders, and even patches of sand stood between me and Kiholo Bay, which was what I'd actually come on the hike to photograph. Even though this stretch of the hike used up nearly half my water, I think I came out better than some.
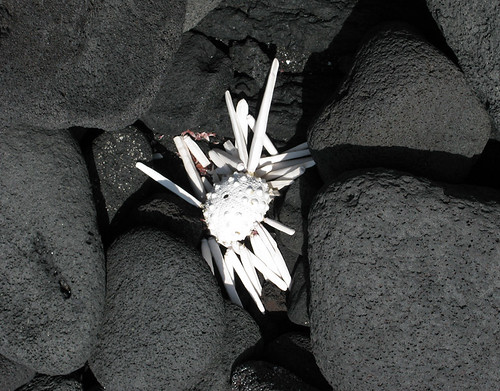

Dead Urchin


In the end it was worth it. Because at the end of the hike was Kiholo Bay, and Wainanali`i Pond.
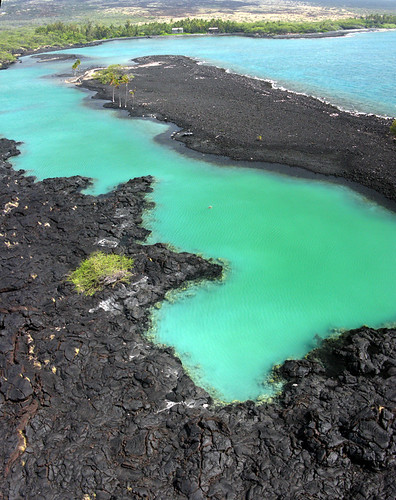

Wainanalii Pond


The pond has the color of a moraine lake, and for completely different reasons. The water is a mix of salt water and fresh water, which forms a highly stratified body of water. The mouth of the inlet is extremely shallow, which helps to maintain the stratification.

A friend of mine has gone snorkeling in Wainanali`i Pond, and said the blue does not actually indicate the bottom of the pond. It marks the separation between the fresh and salt water layers. He said that swimming above it is like swimming in a completely crystal clear pool with a blue floor. As soon as you dip below the blue, everything goes opaque. The bottom is actually rocky. From above you'd never guess.
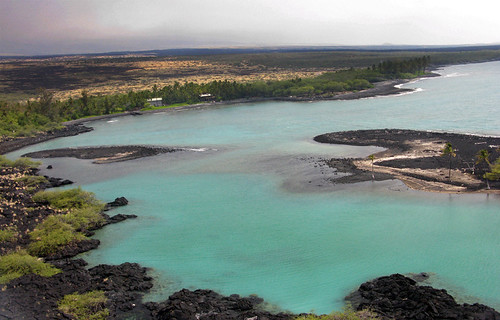

Wainanalii Pond Inlet


In addition to the fantastic water at Wainanali`i Pond, it's also home to one of the largest populations of honu, or Pacific Green Sea Turtle, on the Big Island. In going through my photographs from the day, I found more than twenty turtles. And considering the number that would come up out of the water and disappear back into it, I think I was only seeing the tip of the iceberg, so to speak.
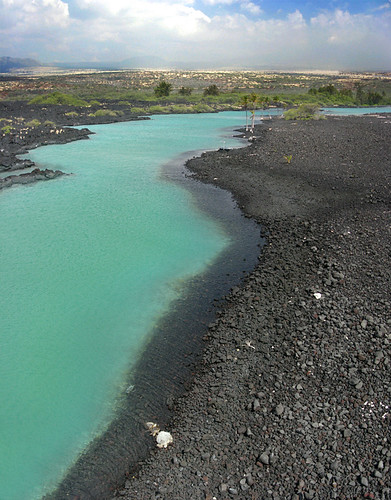

Turtle Stack


One of the more gratifying aspects of going back through the pictures I took was to see the honu out in the water. Keep in mind they are a protected species. You are not supposed to approach them or touch them. Nonetheless, they're curious by nature, and I've wound up swimming with them several times since they like to approach swimmers and see what they're doing.

But none of that compared to seeing them fly through the water the way they do.
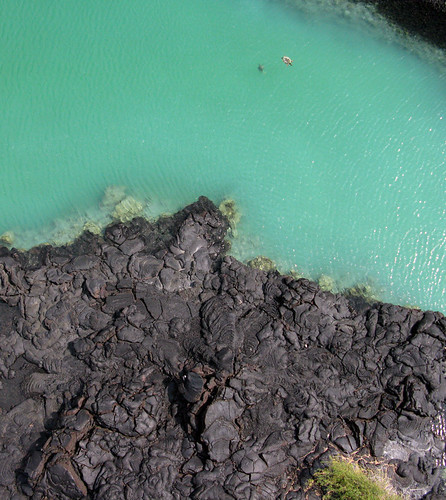

Flying in a Blue Dream


Eventually, it was time to go. I'd hoped to have enough time left over to hike a little further. Not half a mile away is a cold spring that would've been welcome relief after the long hike I'd had. But it was not to be. I'd run up against the clock, and had to hike straight out.

This is another case where it pays to do your homework prior to a long hike. But also, it pays to take your notes with you in case you forget what you learned when doing your homework! Not a hundred paces from where I hiked out, there was a perfectly serviceable trail. But somehow, I missed it.
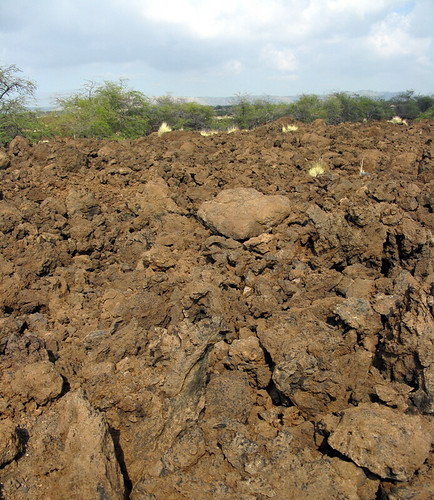

The Way Out


It took longer than it should've.

In the end I wound up reaching the highway, squatting under a bush to cool off and drink the last of my water, and enjoy the first shade I'd had in close to five hours. Sitting on the side of the road might not sound like much, but to me it was heaven.

Tom
Saturday, June 21, 2008

A Very Long Week

It has been a very long week. Roughly 14 days, with a single break in the middle. It started with a week's worth of preparation for the servicing of one of our cameras at work, followed by an instrument change during the weekend. Unfortunately this fell on Saturday, which is the one day during the week when I get my me-time. It's amazing how much missing that can mess me up for the rest of the week.

The week continued last Sunday with a break at Kiholo Bay, where we took the French engineers who were helping us service the camera. To be fair I did fly my camera at Kiholo Bay, but I got up at 5:30am to bake cookies for the luau, so it was still a pretty exhausting day.

Things continued on Monday, with more work at the summit that continued until Friday night.

During this whole fourteen day week we took apart what at one point was the world's largest digital camera, put enough current through a reed switch to turn it into a hybrid rocket motor, dropped a 19" electronics/optics rack roughly 12 feet, rebuilt and tested the crate in a single day, and finally set up the instrument it drives, and tested it at various points on the sky. I spent a total of 11 days above 4000 meters. By the end of the day on Friday, the dark circles under my eyes looked like bruises.

So today I took off with my son and tried to fly a camera.

Aaaand... it didn't happen. He'd forgotten to tell me he twisted his ankle on Friday, and couldn't hike across the lava. So we both did ground photography for the rest of the morning. I got to do large format photography again (four sheets of film), infrared digital, and lots of panoramas. So the day wound up being pretty good after all.


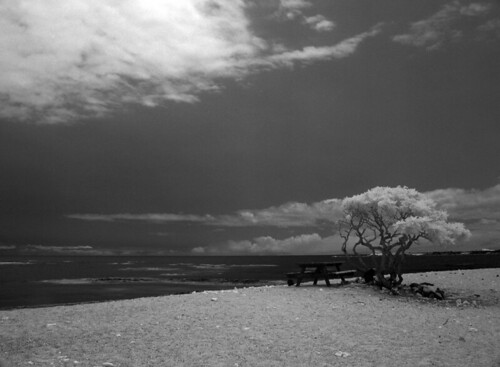
Table with a View - IR


I've got four new images to add to my Zazzle and Etsy galleries, and the weekend is yet young!

I also sold my third print on Etsy at some point during the 14-day week, though I couldn't get the print in the mail until this morning. But it was a nice reminder of better times, and was great incentive to pack up my gear and get out this morning.

Because of the rapid rebuild on the crate, and the fact that we didn't miss our exchange date, my boss gave me Monday off. I planned a pretty hellish hike from Anaeho`omalu Bay down to Kiholo Bay, touching on several gorgeous beaches, and at least one inland pond. I hope to come away with three days of photography this weekend, both from the ground and from the air. So today really is just the start on what I hope is a really good weekend.

Tom

Thursday, June 12, 2008

Infrared with the Canon PowerShot A650 IS & Photographic Noise Reduction

A few weeks ago I tested the A650 IS for response in the infrared, and was really pleasantly surprised to see it had usable response. The exposures are long, roughly 1 second or longer under sunny-16 conditions. But with a tripod or decent support against a fencepost, it's usable.

For my first tests I used an old tried 'n true, a stack of a Wratten #25 red gel and a Wratten #47A blue gel. This combination has almost zero UV leak, and gives you an 85% throughput IR long-pass filter that crosses 50% right around 770nm. It worked:


Canon A650 IS Infrared


With the success of that first test, I bit the bullet and ordered a 58mm Hoya R72 infrared filter, which arrived a few days ago. It has a 720nm cut-on, so you get a bit more light than with the Wratten stack. Plus, it's an AR-coated glass filter that threads onto the end of the lens adapter, so it's a lot more robust. It also works well:


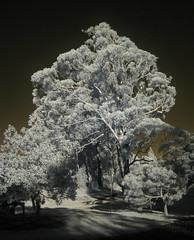
Eucalyptus 720nm Infrared


The only gotcha is that low-light exposures like that, even at low ISO, are noisy. Open patches of uniform sky look like they were shot on Kodak HIE (which is cool, in my mind), meaning very very noisy (ok, maybe not so cool.)

So I tried out a software trick that's used with astrophotography: You take a series of exposures and add them together. You average out a lot of the pixel-to-pixel variation this way, though things that move frame-to-frame come out looking blurred.

Unfortunately this can't be done with typical photo software because if you add a bunch of properly exposed images, you exceed the 8-bit math most image software uses. If you've got a program that does 16-bit math, you're probably set. I wound up using some astrophotography software, Iris. Iris plays nicely with JPGs, though it'll also work with RAW files, which the A650 IS can produce if you're running CHDK on it.

A stack of five JPG images knocked down the noise a lot. This is a stacked image I did using this technique:


Coadded UKIRT in the Near-IR


And a 1:1 pixel-for-pixel side-by-side of one of the original images next to the resulting stack:


Coadded UKIRT Side-by-Side


(You have to view it original-size. It's two 1000x800 images side-by-side.)

So all in all I'm more than happy with the IR performance of an unmodified A650 IS. Granted, the exposure times are long, but for a lot of landscape work that's entirely acceptable.

If you used to do B&W film photography and have a bunch of Wratten fgel filters lying around, you can experiment with IR on the A650 without having to buy anything by using a #25 / #47A stack. If not, the Hoya R72 filters are less than $50 these days, making infrared photography with the A650 pretty darned affordable.

Tom

Saturday, June 7, 2008

First Accessory is the Last

When this all started with the A650 IS, I bought a wide angle adapter with a 58mm adapter tube from a friend of mine. I picked these up a few days after ordering the A650, and had them in-hand before the camera even arrived. Given all the snafus I ran into in ordering the camera in the first place, I had them for over a month before I had the camera.

As things turn out, the tube was specific to the 700-series Powershots, so I couldn't use it. The wide angle adapter was actually pretty cool, though, and threaded onto my 24mm DSLR lens just fine. Still, I haven't been able to use it on my A650 for want of a tube. The same day I figured out the tube didn't fit, I ordered a new one that would.

Yesterday my Hoya R72 filter showed up. This is an honest to goodness dedicated glass IR filter with a 720nm cut-on. It's got a 58mm thread, sized just right for my DSLR lenses (which has really low IR response) and for the lens tube I hope to have soon for the A650.

But it's still not here!

So irony of ironies, the one accessory I got before my camera even arrived, the one accessory I need in order to use everything else I've got for this camera, is the one thing I don't have yet and probably won't have until next week.

Desperation has set in. I even went so far as to balance the Hoya filter on the end of my lens for a sky-pointing IR test. It works great. But what a lousy way to treat a new filter, and what a rotten limitation to have on its use: it has to point up.

By the end of next week I hope to have it in-hand. I know the IR response of the A650 is too low to do aerials, but I'd like to play on the ground, at least. And with the ability to attach a circular polarizer, I hope to have a new view of the kona coast reefs by next weekend.

Tom

Monday, June 2, 2008

A Change of Name

Looking back over the last year of posts, I realize only a small fraction were about my home machine shop. So the title of this blog, "The Tiny Machine Shop" no longer really seemed apt. Rather than try to make it something it's not, I opted to change the name and be honest with myself.

So this blog is now titled "The View Up Here", dealing as it does with so much kite aerial photography. I'll still post the occasional article from the shop, but now at least the title matches the content a little more than it used to. And now maybe I won't wince as much when I post about photography, kites, the wind, and the view up here.

Tom

P.S. Don't worry, the shop is still being used just as much as ever.

Sunday, June 1, 2008

KAP from the Clouds

The weather really wasn't ideal for Pu`u Wa Wa, but we went anyway. It was my first time, so I really didn't know what to expect. The hike was beautiful, the people out there were super friendly, and despite the pain that came after I stopped moving, I had a blast.

I wasn't sure whether to bring the rokkaku, but at the last minute I did. I'm glad. Most of the time the Flowforms wouldn't have flown. The wind at the summit of Pu`u Wa Wa was some of the strangest I've ever had. At one point the rokkaku completely stopped flying, and just became an obstruction in a vertical updraft. The camera was hanging vertically below the kite with a few hundred feet of almost horizontal line between it and myself. It was strange. Made for sharp pictures, though!

During the flight my friend poked me in the arm and said, "Dude." I looked, and there was the rig, but there was no kite. It was inside a cloud. Shortly after, the cloud had almost obscured the rig as well. As a result a number of the pictures I got are less than stellar. But it was unique experience, and one I'm glad I didn't miss out on.

Lots of pictures, mostly personal. I really don't like posting pictures of people, especially not my kids or other peoples' kids. So not much to post to Flickr from this. Nonetheless, I had a blast and would gladly go back again.

Once my feet, knees, hips, and everything else recovers!

Tom

Almost Routine

I got to put the new KAP settings into practice today. -2/3 EV, 1/640 sec shutter priority, floating ISO and aperture. Single shot, auto white balance, 4000 x 3000, minimal compression (but not RAW). The results were excellent:

Wet and Dry

But I ran into a couple of problems, if you can call them that...

The first is that I do get fuzzy images. I need to work on my shutter technique. I'm either firing while the camera is still swinging from the last move, or I'm not giving it a chance to focus and lock. I know, I know, I'm essentially at infinity. But to be honest I'm not. Much of what I did today was vertical panoramas, so I was focusing at everything from my altitude (sometimes less than 50') out to infinity, and several spots in-between. I know the A650 IS can focus at distances longer than 50', so it's shifting focus for each exposure. I need to find a real fix for this.

The other problem is that I came home with 247 images, 99% of which are elements in a panorama. Stitching just one pano takes roughly an hour. I recorded something like thirty sequences. Autostitch makes no provisions for scripting. Autopano Pro does. I'm leaning toward a license for Autopano Pro more and more every day. This is drudgery. How nice would it be to leave the machine cranking all night and have a whole slew of panoramas ready to go in the morning? As it is, it'll take all week.

Which is fine by me. I'd rather have editing to look forward to between sessions than a dry well. In any case the batteries are charged, the bag is re-packed, and if the weather is nice tomorrow I'll be hiking up Pu`u Wa Wa with some friends in the morning.

Tom