In a word: DOH!
So I set up the test again. This time I skipped the whole infrared thing since to some extent it only confuses the issue. This technique should work on visible light images, too. I also skipped the whole black and white thing since this should work on color images as well as it works on B&W ones. I also skipped hand-holding the camera since I had my tripod with me this time!
So without further ado, here's the second attempt at image stacking to improve noise characteristics in an image...
I started with a pretty bland setup in my kitchen: Two cutting boards, one mug (I know... it's dirty), one magnet, one tea ball, and an index card. With my camera mounted firmly to a tripod, and with a self-timer and intervalometer all set up, I took ten "identical" images. Each was shot at something like f/4.6 for 2 seconds at ISO 80. By default the A650 IS also subtracts a dark image from any image longer than 1 second, so thermal noise should largely be removed. Readout noise is pretty minimal for this camera, so most of what's left is photon noise.
A quick note: All the photographs in this article are clickable, and all of them were uploaded to Flickr at full resolution. For the full image shots, that's 4000x3000, so you have to view them at original size in order to see the noise. For the side-by-side shots that's 2000x1000, so you still have to view them at original size to see the noise. Have fun!
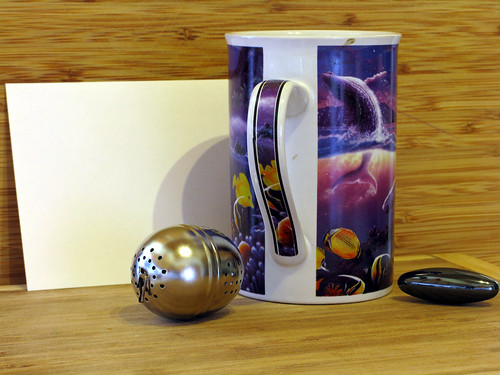
That's the final image in the sequence of ten. Except for the utter blandness of the shot, it looks pretty good! Aaaaah, but if you look closely in the shadows, in the smooth areas of white, and around highlights on the metal bits, it's pretty clear there's a fair bit of noise.
So what happens if you stack ten separate images of the same scene? Turns out, something pretty neat:
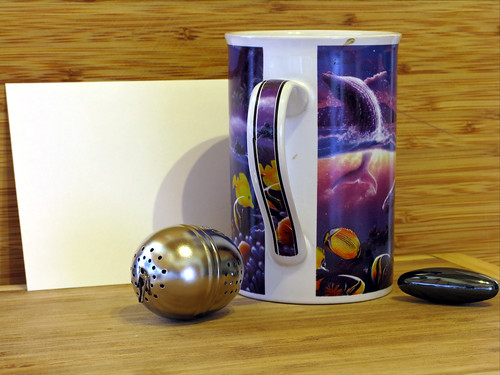
Same scene, same lighting, same everything. But the noise is reduced by a lot. Still, there's nothing like a side-by-side to compare.
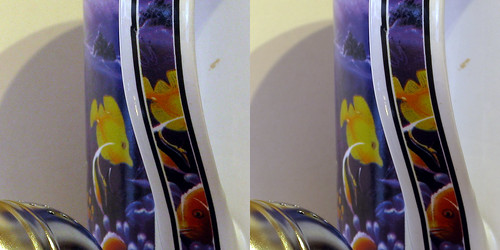
In this first one, take a look at the index card and at the white parts of the mug. The last image from the sequence is on the left, and the stacked image is on the right. The difference in noise level is pretty striking. Also take a look at the silk screen pattern on the mug handle. (Ignore the break in the printing... I didn't print it.) The pattern isn't muddied at all by this technique.
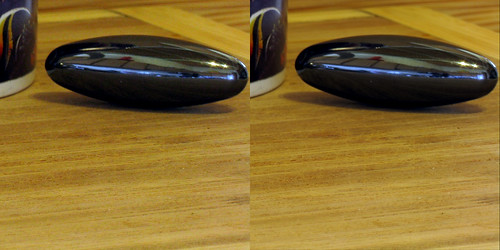
In this second one, take a look at the noise in the wood grain and in the reflections on the magnet. There is a fingerprint on the magnet, which is preserved in both shots. Again, the difference is pretty striking.
In this last one, again look at the white areas on the mug and the index card. There's still a fair bit of texture on the index card in the stacked image. But if you look closely you can see it's just the normal surface texture of an index card, pretty accurately rendered. Almost all the photographic noise is gone. Also, the silk screen pattern is clearly not muddied by this process.
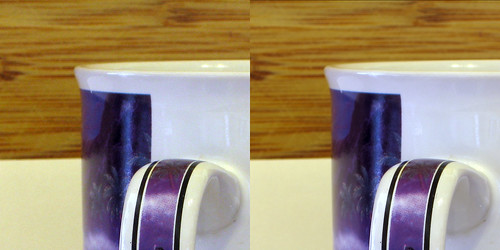
So it really does work! And it works even better if the photographer doing it is a little more careful about technique, and doesn't use fuzzy images in the stack. (DOH!)
What's more, the resulting image will have a lot more information in it than any of the originals. A normal JPG image has 8-bits per pixel for a max value of 256 per color per pixel. I used ten images in this stack, so my max value is 2560 per color per pixel. That's roughly 11 bits of information. Lots of room for gamma correction and filtering without introducing artifacts!
One last note before I leave this topic: This is not HDR. The images were all taken using the same settings. Also, I used JPG images rather than RAW. No reason not to use RAW, but there's no need to, either. Any camera can do this. Any photographer can do this. I'm not sure every photographer would want to, but they could if noise was an issue for them.
Tom
No comments:
Post a Comment