A bunch of good stuff is coming down the pike. I posted earlier that my KAP backpack finally bit the big one. My new one came in today, a Jansport Odyssey 38 in Bok Choi Green. (Egads, gotta love that color.) It's not too much larger than my present pack, but it's much much better designed and made. The suspension is outstanding. I'm looking forward to hauling gear in it! My wishes for a pack that would swallow one of my extension cord winders died when I opened the box and saw how small the pack was, but that's ok. For everything else the pack offers, I'm willing to give that one point a miss. I love the new pack! Can't wait to move my gear over tonight.
Which brings me to my next backpack story: My 4x5 bag died a long long time ago, but I never stopped using it. I should've. The waterproofing on the cloth is now depositing gooey residue all over the camera, which is a really nice wooden monorail. Not the kind of thing you want to have to remove goo from! So I'm bound and determined to repair my old KAP backpack, and reinforce the wear points with the sewing machine tonight. My dragon backpack will live! And it'll be the new home for my 4x5. All good.
I had another talk with Henry about the 4x5 KAP camera, and he brought up a lot of really good points. One of them was a discussion of my George Lawrence stabilization system, and how I was paranoid about stuff falling off my rig and hitting someone on the ground. Henry asked about my digital KAP system, and I had to admit that I had a really nasty multiple single point of failure in the pan servo. The whole rig hangs from a servo. Hangs FROM a servo. Hangs. From a servo. (Did I get that point across?) If any of several parts go, the whole rig comes down in free-fall mode.
I've been meaning to fix this for a long time, but I haven't. Henry had lots of good ideas, and I wound up pulling out my gear assortment. In the end, though, I ordered a pan gear reduction from Brooks. It's the right answer since it solves more than just the pan servo failure mode: With the gear reduction the rig hangs from a bolt with a shoulder on it, so there's a metal-to-metal contact in case of failure. It also lets me switch to a lighter servo, a Futaba S3003. It also slows down pan rotation, giving me finer control over camera pointing. All in all a super good move. And a good precautionary change for something else that's coming up soon. (More on that later.)
I also picked up a pair of Brooxes KAP Klips while I was at it. This isn't for the digital rig, it's for the 4x5 KAP camera. Now all I have to do is make a new Picavet suspension, and I'm ready to launch it somewhere more photogenic than the soccer fields here in town.
This morning I posted about a problem I was having with the AuRiCo rig controller I used to take pictures on top of Mauna Kea. Occasionally my tilt servo would jitter, then point the camera straight up. It happened several times when I flew in Pololu Valley, and wound up ruining several panorama sequences. Turns out the AuRiCo has problems with noisy S3003 servos, and Peter issued a new rev of the AuRiCo firmware. Brooks had the 1.31b firmware chips in-hand, so he's including one in my order. Yaaaay!
So all in all: I got a new KAP bag, a gear reduction for the pan axis, I've got an S3003 lined up as a pan servo replacement, I got clips for my KAP 4x5, Henry gave me all sorts of good pointers on re-doing the George Lawrence stabilizer for that camera, and my Bender 4x5 is about to inherit a heavily over-stitched dragon backpack. Wheeee!
It feels like it's my birthday or something, only better. I don't tend to get presents for my birthday. This is cool! Best part is that it didn't really cost that much, which is good for someone on a budget. And it's good for one more thing:
I've had my eye on a Canon A650IS camera for many months now. It looks like I might be able to afford one at the end of April. It'll let me run CHDK, so my shutter servo ceases to be a part of the rig. It's a 12.1MP camera, but more important it has a physically large CCD, so it doesn't suffer from the noise issues and low-light limitations most high-count pixel CCD cameras have. It really is a good camera for KAP, and will let me start printing 40" wide prints without noticeable pixelation. I'm stoked! And with the gear reduction installed on the rig, I don't have to worry about the thing plummeting to the ground because of a failure in the pan servo.
My only problem now is to figure out how to get some sleep. It's been a really good day.
Tom
Monday, March 31, 2008
Sunday, March 30, 2008
I've Needed Photography

I really do think that's one of the answers to the riddle of my recent bouts of depression. My wife and I were both very active photographers right up until we had kids. We're both landscape photographers, and don't do much people photography. So despite what most people might think ("Awwww! Now you have such cute subjects to photograph!") we went from running two rolls a day every weekend to zip, zero, equipment on the shelf with the batteries pulled out.
We eventually traded all our 35mm gear in for a DSLR body, but kept the lenses because in their infinite wisdom, Canon kept the lens mount. (THANK YOU, CANON!) Still, it didn't see nearly the use we'd hoped, and I began to worry that we'd wasted our money and time. Were we done with photography? Was that it? Really?
When I started doing KAP, I considered it to be something completely other. Heck, if there wasn't wind there wasn't a picture. Contrast that with the number of times I've stood in a field of wildflowers waiting for the wind to die so I could trip the shutter. I wasn't getting out to do photography, I was getting out to do KAP.
But I found out that I could! And that's the important part. The kids were old enough to self-entertain, so all of a sudden it was possible for us to go somewhere, pull gear out, and stand around for hours at a time flying a kite with a camera on it, OR, trying to compose shots and wait for light. The same patience on their part is required either way.
So I tried an experiment. Despite running more of a fever than I wanted, I packed up KAP gear, DSLR gear, my 4x5 bag, and an inordinate amount of snack and water, and bundled me and my son off to the side of Mauna Kea to photograph silverswords. These are an endangered species of plant unique to Hawai`i, and the Mauna Kea Silversword is unique to the Big Island. The last time I'd visited this particular area there were two plants in one spot and maybe seven in another.
Silverswords are a lot like yucca plants in that they flower once, then die. With a silversword it can live anywhere from four to a hundred years before flowering. You really can't tell until it happens. It had been close to four years since my last visit, and I was worried they might all be gone.
To my amazement and delight, both of the plants at the first site had died, but they had had numerous offspring. One cluster must've had ten individual plants growing in it. My son spotted two other cluster. They were spreading!
At the second site there were dozens of plants scattered over a much larger area than before. I just about jumped up and down and cheered! I did set up my tripod a second time to photograph one of the silverswords in this group. As I finished setting up the shot my son asked if he could take a picture, too. I handed him the cable release and said, "I'll tell you when to trip the shutter." He tripped it three times before I even got a film holder loaded! But by the time I was ready to pull the dark slide, we had an understanding.

The ladybug was gracious enough to pose.
I made an abortive attempt to photograph the field of silverswords from the air, but unstable mountain winds put a quick end to that. My rokkaku was up about 250' above the ground when the wind died entirely. I was taking in line as fast as I could in an effort to grab the camera before it smashed into the ground when I heard my son shout, "DUST DEVIL!" Even with gloves on, I swore the line was going to chop my fingers off. It must've been a 35 knot blow. With a kite with almost 32 square feet of surface area, the force was outrageous. I managed to walk the kite down and stow my gear before any serious injuries happened.
When we got home I sealed up the bathroom, checked for light leaks, and set up the trays for developing. It's hard to describe the emotions when you finish fixing the film and get to turn on the lights. I still work to the numbers because there are chemicals to put away, trays to clean and stack to dry, and a timed rinse to go through. But as each sheet is pulled from the fixer and placed in the rinse tank, it's like taking in a deep breath of crystal clean air. Life itself.
I've needed photography. I realize now I've needed it for years. It's refreshing to be able to do something about it.
Tom
Friday, March 28, 2008
Not As Good, But...

By the time I got up four out of five people in the house were running fevers, and I was one of them. My youngest daughter was the only hold-out, and after a minimal amount of paper-scissors-rock and drawing straws, I wound up taking her out of the house to keep her from iggling her siblings to distraction. (That did happen later, so it was a valid concern.)
We went to Waipi`o Valley. The air was pretty opaque from the gasses being pumped out by the volcanoes, so this was as close to a sweeping landscape as I came. I was also sick and exhausted, and didn't drag the camera more than fifty feet from my Jeep.
My one claim to success was going to be a driftwood arrangement I set up to photograph with my Bender (which is pictured above). I found the perfect piece of wood with gorgeous texture and detail. I half-buried it in the black sand, nestled among a bunch of water-rounded lava rocks. Perfect! I composed, focused, locked, pulled out a film holder, metered, set the lens, and exposed. Click!
Meanwhile my daughter had found a really beautiful piece of spalted driftwood, some ironwood seed pods, and some lava rock of her own, and had set up what I have to admit is a much better arrangement. I'd only shot one side of my film holder, so I set up to shoot her arrangement using the other sheet.
It was after I'd tripped the shutter that I realized I'd grabbed the wrong film holder. Instead of TMax 100 (a black and white film) I'd grabbed my last two sheets of Kodak Portra VC 160 (a color negative film). Not only did I use my last two sheets of color film on a black and white subject, but I'd over-exposed by almost a stop. ARGH!
I re-shot hers with TMax, and it came out wonderfully well. So maybe there'll be enough detail in the Portra shots for me to process them in Gimp or Photoshop. Only time will tell. But needless to say I was disappointed.
When we reached the overlook at the valley rim, I tried to take a sweeping landscape shot. But by then I was just about passing out from exhaustion and general wrotten-ness. (My daughter was bouncing around like the energetic little ... you get the idea. Not what you need around you when you're sick.) The sweeping landscape shot was over-exposed, and didn't have enough detail in the highlights to print. Strike three.
As a parting shot I posed her for a portrait in front of some paperbark trees. Of all the photographs I took, it was by far the best. Maybe I need to stop doing landscape photography.
By the time we got home I was ready to collapse. But then there was lunch, kid-wrangling, mending my camera (which had a mounting stud for the back pull out while we were in the valley), dishes, etc. Egads I hate being sick. Because most of the time you really don't get to just stop and get well.
Glad the pictures came out, though.
Tom
Wednesday, March 26, 2008
It was a Good Day

We all hiked down into Pololu Valley today. I flew my rokkaku, and later my Flowform 16. The rig was set up for autoKAP using the AuRiCo (sorry, no 4x5 KAP at that site until I know the wind way better.) I found out later I was flying for over two hours. It felt like thirty minutes.
I was feeling crummy yesterday, and now I've got a powerfully sore throat and some mild dizziness. I almost crashed the rokkaku into the cliffside, and almost lost my rig to the ironwood trees. My son got sand in his eye and wound up abrading his cornea before we could stop him from rubbing, and he hiked out almost blind on one side from all the tears.
It was a good day.
(In case this makes no sense, please see the pilot episode of Firefly. Watch it all the way through. If it doesn't make sense at the end, you didn't pay attention.)
I can't wait to do it all over again somewhere else in the morning!
Tom
Tuesday, March 25, 2008
I'll Be Danged - Depressed Again
Ok, so maybe it wasn't just that I haven't been able to fly my kite. I'm back to hard-core depression, and I even got to fly a new camera this weekend. Can't blame the weather, either. It's clear, it's sunny, there are big puffy clouds on the horizon like a Hayao Miyazaki movie, and there's even wind to go along with it. And I'm still trying, minute by minute, not to just sit down and sob.
I'll admit, there's other stuff going on. But as someone has already pointed out to me, everyone has stuff going on all the time. So what's the deal?
Tomorrow is a work holiday, and I'm taking the next two days off. Not a lot, but maybe a chance to get my head screwed back on straight. And maybe a chance to get out with some cameras and come home feeling something other than mentally bruised.
Tom
Monday, March 24, 2008
Darkroom Timer & AVR
My darkroom timer died. Unfortunately it died in the middle of processing the first two test shots from my 4x5 KAP camera. Luckily it died in a way that I could tell it died, so I finished out the rest of the processing by counting in my head. I over-developed, but I wasn't after exposure so much as information on focus. (Focus was off.) The next two shots I timed by having my wife read time through the door to me. She would've rather been reading. (She said so... but I really did figure it out for myself, first.)
To finish matters off, it started working again some time in the middle of the night. I was very thankful that my wife only shoved it into my hands at 1:30am rather than ramming it down my throat. It woke her up. I figured "never again" would be a good motto to adopt at this point.
In case you're wondering, my darkroom timer has been a Timex Ironman wrist watch with the timer set up as a Countdown and Repeat. Every sixty seconds it beeps for ten seconds, and keeps counting. I keep count of the beeps, and that tells me how many minutes have gone by. Since my developing times are almost invariably 8min developer, 1min stop, 10min fixer, (lights on) 10min rinse, 1min photoflo, sixty second resolution isn't bad.
I looked at commercial timers, but they all seem to be made for paper, which is not panchromatic. So they glow! Glowing kills my film! Besides, I couldn't afford any of the ones I saw. So I made a new one.
I wanted something that didn't emit light, something that replicated what the Ironman watch did, but that was smart enough not to wake people up in the middle of the night. Besides, the alarm on my watch is ear-splitting. I wanted something a little more muted since I do most of my developing once people are in bed.
I hemmed and hawed around the problem for a while, but finally hit on the solution yesterday: An AVR Butterfly!
The AVR Butterfly is a demo board for the ATmega169, an 8-bit microcontroller from Atmel. The Butterfly has a 169 running with an internal oscillator at 8MHz, and also has an LCD display, a temperature sensor, a 32.768kHz crystal, a small joystick, a buzzer, and if you have one of the older ones it has a CdS light sensor on it as well. All for under $20 US. Can't beat it!
In a way this application is an insult to the Butterfly, which has loads of capacity. One really cool application I've seen turns the Butterfly into an AVR programmer. You load your .HEX program file onto it, and you can plug it into the ISP port of any AVR processor and it'll load the code without being tethered to a PC. Perfect if you're mass-producing an AVR-based product.
But all I wanted was a darkroom timer...
The application is a free-running real-time clock using the 32.768kHz watch crystal to generate a system interrupt once every second. The CdS light sensor is used to tell if the darkroom lights are off or on. If they're off, the buzzer operates once every 60 seconds. If the lights are on, it's silent. The joystick is used to reset the timer to zero. There really isn't much to it.
So what about night-time? The AVR Butterfly has a button cell mounted on the back of the board. Take out the button cell. It's off. No power, no clock, no noise. And it saves your battery to boot. No more midnight wakeup calls!
Here's the best part: The AVR Butterfly was originally designed to be handed out at embedded processor conventions, so (true to geeky form) it's got a jewelry pin on the back so you can pin it to your shirt. Yeah, you can imagine how goofy it would look to see hundreds of people wearing LCD displays on their shirts. Don't laugh! I've done this, and even had a scrolling message rolling across it! (It was a kids' festival, and I was promoting our robot club... cut me some slack.)
So to use the timer you just install the battery, pin it to your shirt, set up your darkroom while the timer just counts quietly to itself, and when you're ready you turn off the lights, unload your film holders, wait for the first beep, and slip the sheets into the developer tray. You're off!
I doubt there are more than a handful of people out there who would use one of these. But if you find yourself in the same situation I was in (busted darkroom timer, furious spouse ready to ram things down your neck, and an AVR Butterfly sitting on the shelf) I'll happily upload the .HEX file for you to load on your own Butterfly. And if you're really interested, I'll happily share the source as well.
Tom
Saturday, March 22, 2008
Ma Bag be Daid!
My KAP bag finally died. I have to say, as far as backpacks go it's probably the prettiest one I've ever had. It had a lovely dragon design stitched into it in red and black, which offset the bag's white and black coloring quite nicely. And at $20 on special during Back to School, it was a steal.
Except that it was about $20 worth of stitching. The internals started falling apart some months ago, and the straps have shown signs of letting for for a while now. But it was the top handle that really convinced me it was time to get a new bag. The handle ripped free, opening up a major seam on the body of the bag itself.
Let's face it. I abuse my gear. KAPing is already tough on most book bags because it's not books you're toting around, but relatively bulky things with sharp edges on them. Line and winders are not light by any stretch, and tend to get stuck at the outer edges of the bag where the forces can do the most damage. It's a rough person putting rough wear on a bag with a rough load.
Time to switch! I ordered a Jansport Odyssey 2007 day pack from the REI Outlet Store. It should be here in a week.
Making the decision took a while. I wanted a bag I could actually stick a winder into instead of just hanging it off the back. But the bag also has a loop for a climbing axe, so it should be able to handle the weight of a winder and line without breaking a sweat. The bag has lots of pockets, an essential for how I pack my KAP gear, and has a good suspension, which is great for someone with recurring back problems.
I don't believe for a minute I'll be able to get my KAP 4x5 into the thing, but it's nice to know I can get a full KAP kit into it and carry it onto a plane without having a bunch of stuff hanging out. I'm looking forward to it.
Besides, REI has a warranty on their backpacks! If my rough ways are too much for it, they'll replace it. (Not that I've ever had to cash in on an REI warranty... they sell good stuff! I still have my Mountainsmith mountaineering backpack I got almost fifteen years ago. A solid pack, and still in great shape. I'm not worried. I think I have my new KAP bag for many many years to come.
Tom
Friday, March 21, 2008
First Flight

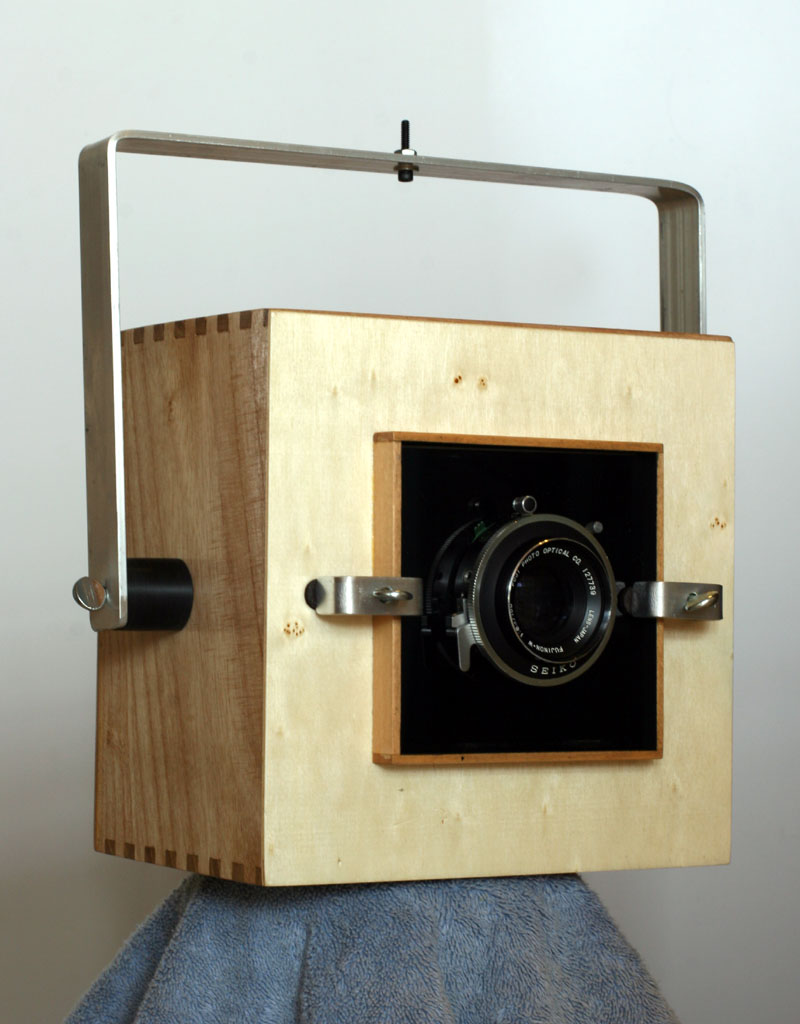
The 4x5 box camera flies! There's still no stabilization on it, but I flew it as pictured in fairly light wind from my 6' rokkaku. Following advice from Henry Jebe, who was one of the folks involved in re-creating George Lawrence's famous photograph of San Francisco using a replica of Lawrence's camera, I waited until the rokkaku over-flew its wind and dipped, offering the camera its most stable flying conditions. I haven't developed the film yet, since I can't secure my "dark room" (read that as "bathroom") against stray light during the day. But I'll post as soon as I can.
I wound up shooting at 1/500 seconds, the fastest my shutter will go. This put the aperture at f/11 with 100 speed film under-exposed one stop. If depth of field is an issue, I can switch to TMax 400 film and gain two stops on the aperture. Time will tell if this is necessary or not. I really like the grain of the TMax 100 better, but I'll bend if bending means I get better images.
I'm excited! The first flight was in a location I knew well with wind I'm familiar with, though it's not the most photogenic spot in the world. If the test shots come out ok I need to pick a pretty spot for my next shots.
Wahoooo!! It FLIES!
Tom
Wednesday, March 19, 2008
4x5 Box Camera - Done
I finished the 4x5 box camera tonight. The servo-driven cable release operated the shutter perfectly, and served to take two more test images to verify I finally got focus done right. Both were at f/6.3, as wide as that lens goes. I haven't developed them yet, but should have them done before the weekend.
The spring back I took almost verbatim from the Bender 4x5. Same idea, slightly different execution in the end. It's a little tight, but if that causes problems I can always make a second one with more clearance.
I used two 1/4" cable clamps to hold the radio antenna, same as Brooks uses on his BBKK rig. Velcro all over the top bracket allows the radio, batteries, and servo release to be stuck wherever it's convenient to balance the rig.
So what's next? Well flying it, of course! All this is pending development of the test shots, but I hope to fly it somewhere pretty some time really soon. Unfortunately I don't think there's much more testing I can do. Past this I just need to swallow it, send my best 4x5 lens up into the air, and hope things don't get nasty up there.
Yahoooo!
Tom
Tuesday, March 18, 2008
New Hope
I went back and edited some of the photos I'd posted from Saturday to get rid of the strong blue cast in all of the snow pictures. While I was there I ran across that B&W 4x5 shot I did of the hibiscus flower. I felt a pang of sadness when I saw it because only a week after I took the picture the plant's owner wound up "trimming" the 7' high bushes down to about 12" of stick poking out of the ground. The flowers are gone, and I probably won't be able to photograph them again for at least another year, if they even survive the treatment they received.
So I guess this last round of depression was fed by all these changes happening, none of which were good. The flowers were gone, the weather was gone, weekends were melting away into "ought to"s instead of "want to"s, and this awful spiral just couldn't seem to slow down, much less stop.
So Saturday was a real breakthrough. I threw caution to the wind in a very literal fashion and in addition to stretching myself as a KAPer and flying in a location that's notoriously difficult to fly in, I got some good pictures out of it, too.
So this spurred me to revisit The List. I've had a list of places where I wanted to do KAP as well as 4x5 ground photography, and each time I go to a place and get a chance to learn its quirks it either ratchets up to the top of the list of places to go and really photograph, or it winds up being taken off the list entirely because it becomes a regular haunt for me to go visit.
The great thing is, the list is long. There's still a lot I haven't seen here. And of several places I've seen, a great many of them are tricky or difficult to do photography in. Most of the time the list lives in a text file on my mail server. But this time I wrote it down at the end of my calendar on the page for January 1, 2009. I'll let it serve as a reminder when that day comes that there's still a lot of exploring left to do. I can't imagine even for an instant that when January rolls around my list will be empty. It's the promise of things to come.
Saturday gave me new hope in more ways than I can count. I'm determined now to try to fly in Waipi`o Valley again, as well as Pololu Valley. They're tough places to fly. I get that. But it can't be bad weather all the time. And when the weather is good, it's magic.
Tom
Sunday, March 16, 2008
Depression and Addiction - Geekism at its Core?
I've been in a pretty nasty run of depression on and off for the last few months. Friday it finally got the point where I really wasn't able to function any more. I couldn't smile, couldn't laugh, almost couldn't form words with my mouth. I've been there before, and absolutely positively hate it.
The weather has also been just plain horrid of late. I can't chalk this up to SAD (Seasonal Affective Disorder). It's not like the weather kept me housebound, it's just been bad. No wind for kites, the volcano is pumping out way more sulfur dioxide than normal, so the air is too opaque for landscape photography, my shop is a mess, and it's like all that was interesting in life just got sucked out, leaving this empty, aching shell behind. I know I already said this, but I absolutely positively hate it.
Today I took my son down to Pu`ukohola to try to photograph the black tipped reef sharks from the air. But for once the wind models didn't match reality, and I couldn't even get a kite to stay up, much less loft a camera. I think the morning would've been a wash if my son hadn't found this nasty, rusted out old file buried in the sand as I packed my last kite away. I scratched enough rust away to realize it was a Nicholson 10" mill bastard file. It was a nice file! It was just absolutely caked with rust and looked like junk.
The spark went on! Electrolytic rust removal! "Hey, want to see a neat trick?" "What?" "Wanna strip all that rust off and see what that file looks like?" "Sure!"
We drove home, and I set up the electrolytic rust removal rig. A while back I wound up having to strip rust off enough stuff to justify making a nice hangar bar for my tank, so suspending the file in the bath was no problem. I even got to impress my son when I drank some of the chemical (it's baking soda and water). An hour later the rust was gone, the file was clean, and now I'm going to fit it with a handle so it can be his file. Hey, finders keepers!
Strangely, by this time I was feeling a lot better. I could smile. I even laughed.
In the afternoon the kids had a date at a friend's house, so I threw all my gear in the car and took off. I only got about half a mile before I realized what I really really needed to do.
I needed another fix. I'd had a shop fix stripping the rust off that file and sweeping up while it was in the tank. It helped. The shop got cleaner, I got to actually DO something, and my son has his first metalworking tool. But I needed more.
The past few months I've been trying to expand my kite aerial photography. I've DONE beaches. I've DONE reefs. And most of my non-beach stuff has been... well... I would describe it as awful, for the most part. I'd like to do more architectural KAP, but most of the architecture on the island is in Hilo, and most of that is in an area that's almost unfliable because of the wind in that town. It's as if KAP had abandoned me. If you can't get good KAP you find bad KAP, and that's what I'd been doing for months.
That's when it hit me: I've had a KAP project I've been putting off for one reason or another since November of last year. The time had come. The time was now: I was going to fly at the summit of Mauna Kea. The wind was a reasonable 20 knots, which at almost 14,000' above sea level was closer to the force you'd get from a 15 knot wind.
Problem is, you can't use radios at the summit. Oh sure, we use radios inside the domes, but we have a set of frequencies we can use, and we don't step outside those bounds. Cell phones mess up the radio telescopes. My KAP transmitter? It'd be like shining a spotlight at one of the optical telescopes. Huge no-no.
In January I'd picked up an AuRiCo, or Automatic Rig Controller. It's a PIC-based board that drives the rig in any number of patterns for doing automatic KAP. No radios, no EMF emissions (aside from running DC motors), no nuthin'. Perfect.
But I'd never tested it. Oh sure, I hooked it up at home long enough to realize it drove my shutter servo backward from how I had things set up for radio control, put it away, found out how to reverse the servo, and had never picked it up since. I was going to drive to a remote site with unpredictable wind, fly a rig I'd never tested, and that was how I was going to feel better?
Oh hell yes!
I put the AuRiCo onto my KAP rig while I sat parked next to the weather tower. The anemometer was ticking over nicely, and things looked pretty stable. I had to make a small tweak to the shutter servo's arm to get it to make good contact, but with that one change the AuRiCo driven KAP rig seemed to be going well. Out the door!
For the next four hours I launched, tweaked, re-launched, tasted the wind, smelled the clouds, and flew higher than the birds. And for several hours my Flowform 16 was the highest thing in the Pacific. I wound up flying from three locations, and saw some of the weirdest wind I've ever seen in my life. From one location my kite consistently flew lower than my feet, even with three hundred feet of line out.
At a third location the Flowform couldn't generate enough lift, so I switched to my 6' rokkaku. For some reason the sail had shrunk by more than half an inch! My guess is the low humidity made the ripstop contract. While I was packing the Flowform, the rokkaku inverted and flew straight at the ground with the camera upside-down and hurtling toward the rocks below.
A quick note on the rokkaku design. It's a fighter kite. But it has some give. If you set it up to be unstable, it's a lightning fast fighter that responds instantly to changes in line tension. If you set it up to be stable, it's usually nailed to the sky. PERFECT for KAP. I try to set things up to be as stable as possible without making it so stable it can't fly. But for some reason it decided to invert. My guess is it was the over-tight sail causing grief, taking my usually very predictable tuning and turning it back into a fighter kite.
The normal response for this situation is to let out line until the kite turns right-side-up, then tension up to let it climb for altitude. But I'd clipped it off to my anchor while I pulled the Flowform down! I couldn't pay out line!
I jumped for the line, pulled in a few arm lengths (making things worse since it accelerated the kite and the camera toward the ground), then let it out in an effort to get the kite pointed skyward again. With probably 600' of line out, it reversed with the kite less than 50' off the deck and climbed back to altitude. It took my heart considerably longer to stop slamming me in the chest.
At the end of the day I had well over three hundred pictures to sort. It's strange not having any say about what the rig is pointing at or when the shutter will trip. But it's not a bad feeling. I got to concentrate on flying the kite rather than the camera, and the sense of serendipitous discovery at the end was well worth the price of setting aside control for a day.
The final tally? Two near catastrophic accidents, one close call on downing the Flowform, lots more high blood pressure and stress than I should probably have been summoning for myself at that altitude, and... And more good KAP pictures than I've had since December. If you haven't watched the pilot episode of Firefly, do. You'll understand why I say today was a good day.
It was like a weight being lifted from my soul. I'm not depressed. Not right now, anyway. And not feeling like I'll back-slide tomorrow.
At work any time we have a problem we try to do a root cause analysis so we know we've nipped the real culprit in the bud. It's harder to do on yourself. Machines can be taken apart, looked at, prodded, poked, and tested with a meter or calipers. The human mind is tougher to work with. But in this case I think I found my root cause: I'm addicted to hanging cameras off of kites. I'm addicted to seeing the pictures come rolling off the chip afterward. If I can't get my fix, I get messed up in the head.
So what does that say about geeks in general? Are we all simply addicted to the activities that bring us pleasure? People joke about internet withdrawl, but maybe there's more to that than we think. Are we all just addicted?
My take? So be it. I hope to get out tomorrow, too. If not with the kites, then with the 4x5 and a tripod. What can I say? I'm a geek.
Tom
Friday, March 14, 2008
First Light Redux
Ok, so the first light on my box camera isn't so different from first light on any of the instruments at work. You win some, you lose some, some stuff works, and some stuff makes you go, "Arooo?!"
The good news is neither image showed light leaks of ANY sort. This is a little surprising to me, considering how hard it was to get the front of the camera light-tight, and that I accidentally popped one of the film holders up a little while pulling the dark slide. (What I get for running with no springs on my spring back.) It apparently didn't pop enough to get loose.
The bad news is the focus is off. problem is I can't tell how it's off. Odd parts of the image seem to be in better focus than others, but there's no rhyme or reason to it. I think I need to go back to the ground glass so I can work with it for a little bit. The f/16 shot should've given me a fair bit of depth of field, and the fact that it didn't leads me to believe I'm still on the long side of infinity. This can be fixed with spacers. But I basically need to pack everything up, park myself somewhere with a lot of things at a lot of different distances, and play until I understand what's going on.
So no, no pictures to post. But I hope to have it figured out in the very near future.
(Rats...)
Tom
Thursday, March 13, 2008
Tippy

Tippy is done! In the end I found out the switch had a very definite cut-off at 3mm, so I was able to thread the switch in until it contacted the ball, back it out two turns to get 2mm of clearance, and 1mm of translation of the ball would break the circuit. I cut the headspace down to 5mm, leaving a good healthy margin for error, and was able to re-draw the part using 2" diameter bar stock. It wound up being about half the volume of the original design.

The other big change is that I went from four M4 socket head cap screws to four M3 socket head flat head screws. It makes for a cleaner look, in my opinion. The mounting holes were also changed from M6 to M5, leaving more threads engaged albeit in a smaller diameter screw. (A single M6 screw could easily hold my car off the ground without breaking... the whole switch assembly weighs less than a pound... c'mon!)
Tippy triggers pretty consistently at 20 degrees plus or minus a small bit. The spec is 20 +/- 1, so I think we make it with room to spare. All that's left is to package the power supply and optoisolator, which is just drilling holes in a Bud or a Hammond box. Done!
That's always the real thrill with making something you designed from scratch: having it look better than your 3D renderings of the CAD model. This one came out AOK.
Tom
Tuesday, March 11, 2008
First Light!
The 4x5 KAP box camera has seen first light! The spring back is complete, minus the springs, and the remote shutter still isn't finished. But I was able to load film, point it at something roughly 300' away (trees), balance it on the tip of one finger (simulated kite string) and trip the shutter with a normal cable release (pretend I'm a servo.) The first shot was done at f/11 1/250, and the second at f/16 1/125 on Kodak TMax 100.
Using the camera is a little strange. I've grown used to the idea that a 4x5 shot takes time. Time to haul the gear in, time to assemble the camera, time to compose the shot, focus, arrange tilts and shifts, re-focus, etc. I rarely do a 4x5 shot in less than an hour. These two test shots took only a few seconds apiece. No focusing, no movements, nothing to assemble. Pull the dark slide, point, click, put the dark slide back in. Done!
There's still a fair bit to do aside from the springs for the spring back and the shutter release. The tradewinds were blowing again this morning, so I held it up on the tip of one finger to see how it moved around. It moved around! A lot! Henry suggested adding some sort of stabilizer like the one designed by Christian Becot or Mike Jones, and also said that George Lawrence used some pretty substantial pendulum weights on his camera when he photographed San Francisco after the 1906 earthquake.
No matter what, I still have quite a bit of experimentation and testing to do before the camera takes to the air. Tonight I hope to add the springs to the spring back and run a length of kite string between two of the trees in my yard so I can start testing stabilizers.
So how did the pictures come out? No clue! I'll have to wait until tonight to develop them. But I have high hopes that they will come out. With any luck they'll even come out without significant motion blur.
Tom
Monday, March 10, 2008
Nostalgia for the Less-Strange Google
Once upon a time I had a computer in my house that I used as a web server. I had an address through Dyndns, Google regularly swept my machine, and life was good. Then I installed a new OS, my Dyndns name expired, someone in California took it (aaaah, the wonders of traceroute and DNS), and I got very cross indeed.
So now I have a new computer in my house, it's running Gentoo again, I now have my own domain, and things are moving toward being good again.
Except for some strange reason Google won't sweep the thing any more. The reason? Well, obviously because my URL changed, but Google said the new one isn't being cross-referenced from anywhere else on the web. Fair 'nuff. I updated my URL on a couple of profiles online, got things pointing in the right direction, and... No dice.
What's odd is I typed in the name of one of my Flickr photos to see how things were coming out, and my blog wound up first in the list! So just to get Google in motion, this entry in my blog is strictly for advertising (which in my book is lame):
Flickr Gallery
Imagekind Print Gallery
My Web Server
There ya go, Google. Index away. (And may I roast for doing this... Sheesh, back in the day you could just type in a URL and it would add it to the database for the spiders to hit.)
Yeah... nostalgic for how it used to be all of eight years ago. Now that's generation gapping for ya.
Tom
Saturday, March 8, 2008
Box Camera (Cont'd)
The box camera is coming along just fine. I pulled the ground glass out of my Bender 4x5 to focus the camera, and only had to add a single 1/16" spacer under the lens board to make it all work. The upper bracket is done, and the Picavet cross will just come off my BBKK KAP rig. All that's left is the spring back and the servo-driven cable release for the shutter.
But I can take pictures with it right now. Which is an odd thought, considering the thing didn't even exist a week ago!
All in all I'm really pleased. My only nagging paranoia is the contemplation of failure modes. I really don't want to see that lens plummet to the ground because something in the camera broke. Before it flies I may be adding some safety tethers.
Tom
Friday, March 7, 2008
Whoa! Don't tip so far!

I finished up that job where I broke the half inch end mill, and now I'm on to the next one: a switch.
We've got a piece of equipment that shouldn't tip over beyond about 70 degrees off vertical. We needed a switch to tell us if that happened so power to the equipment's motors could be cut. There are all kinds of digital sensors that can be used to do the job. A good case in point is a three-axis accelerometer. Spark Fun sells these for not too much (about $100 US per axis). The idea is that in an object at rest, you should get some vector sum of your three orthogonal axes that equals 1g of acceleration. The direction of that vector is "down". If your "down" drifts too far off your Z axis, you've tipped beyond your limit.
Buuuuut such things require math, computer processing, and reliable software and hardware. In essence it's a sensor, but it's not a switch. What we wanted was a switch. Even if the computers go wonky, we need the switch to still be a switch.
The rendering above is what I'll start making on Monday. With any luck I'll finish it on Monday, too. It's a cone, cut to a 40 degree inclusive angle, with a ball in it and an inductive proximity switch set to trigger at the presence of the ball. Tip the cone more than 70 degrees off vertical, the ball rolls away, and the switch opens up. Voila: The tippy-switch.
It should be pretty fun. The inductive switches are threaded M12x1, and the cone will be cut as a single part. The cap is just a slice from the same round, or a piece of 1/4" plate cut down to size and drilled for screws. Once the cone and cap are finished, the flat and mounting screws can be machined on the mill.
But the real fun for this will be the long tapered bore. I've done some smaller tapered bores when I was making rocket nozzles, but this will be bigger than any of those. (In case you want to see a tapered bore getting cut, watch October Sky with Jake Gyllenhaal and Laura Dern. At one point Leon Bolden, played by Randy Stripling, cuts a tapered bore in a rocket nozzle for Homer Hickam, played by Jake Gyllenhaal, and calls his attention to it. Can't miss it.)
I'll post a picture of the switch once all the bits and pieces are finished. But the real test will be wiring it up, bolting it to a rotary stage, and finding out if it really ticks over at 20 degrees off the horizon.
Can't wait!
Tom
Wednesday, March 5, 2008
A Weekend of Cameras?
My daughter went on a whale watch cruise with her school, so I "loaned" her the Coolpix 5600 from my KAP rig. (I say "loaned", but we originally got that camera for the kids, so in a way it's coming home to roost.) In any case, the camera was out all day on a boat in the middle of the ocean, so I'm at least partially expecting it to be damaged, destroyed, or lost. This is no slam against my daughter, mind you. Boats just eat cameras. They do. So does salt water.
So this weekend I plan to finish the 4x5 box camera. If anything went wrong on the cruise, it may be my only KAP camera!
There's really not too much left to do. I need to make the spring back to hold the film holder in place, and I need to make the lens board clamps to hold the lens board on. Past that the only real work is machining, preferably in Delrin, to make a cable release that can be driven by a servo. Radio and batteries will be mounted using Velcro (normal, for me), so that's about it. May sound like a lot, but I expect I can get the wood work done for the back this evening, and the clamps are all drill press and bending brake work. The most tedious bit will be waiting for the umpteen zillion coats of tung oil on the spring back to dry.
After looking at a bunch of B&W and large format groups on Flickr, I'm convinced that long exposures on waterfalls in B&W are cool. Since this place is crawling with waterfalls, I really don't have any excuse. I need to get out this weekend and get shooting.
Two Portra VC sheets can be pulled from their film holder to be shipped to the Fuji lab in Arizona, making it a total of five film holders I can now travel with (YAY!) Ten shots without having to reload in the field. That's more than I can comfortably develop in a single run, so more than that really wouldn't do me much good.
I have one KAP shot I really want to get this weekend (assuming the camera makes it back from the whale cruise), but it requires high tide to pull off the shot, and an offshore breeze to boot. High tide is before sunrise or 5:15pm these days, so I hope I get some cooperative wind this weekend. I'd like to get this shot done and get it out of the way. Meanwhile if I can do some 4x5 with some sea turtles, I'll be a very very happy individual.
Hope it's a good weekend! Sure shaping up to be.
Tom
Tuesday, March 4, 2008
Broken End Mills
I'm used to breaking end mills. As one machinist put it, they're a consumable. They really do break. And depending on what you're doing it'll happen more or less frequently. My worst nemesis project was a big copper heat sink that was entirely made using a 1/8" end mill plunged almost half an inch deep. Recipe for disaster. I must've killed four before I finally got the thing finished. The end result? The customer decided copper was simply too heavy and switched to aluminum. ARGH!
For the most part the end mills I break are in the "tiny" category: 1/8" diameter and smaller. They're thin, they're flexible, they typically have a lot of length for their diameter, so they're fragile. Any little thing goes wrong and snap!
Today I broke a half inch end mill. ?! !!! I was surprised. These are typically beefy, thick, strong, and tend to dull out well before they break. This one wasn't even in bad shape. Upon reflection, though, I realize what I did wrong.
I was doing a technique called "chopping". I learned it from a tool and die maker. When he showed me the technique he said, "This is one you'll never find in a textbook." He's right! I've never seen it described anywhere. So here it is:
In most CAM systems, when you want to hollow out a large area, it'll tend to do it through a process called "pocketing", "countour pocketing", or somesuch. The idea is to run the end mill around at a given depth in the area you want removed, after which it'll plunge down slightly deeper, repeat, plunge down slightly deeper, and repeat (ad nauseum) until it reaches final depth. A good CAM system will then clean things up with one or more "finishing passes", shaving off a few thou to a few tens of thou to get a nice finish at the bottom of the pocket and on the side walls. Depending on the rigidity of the machine, the size of the end mill, and how far over you're willing to let it step as it runs around the pocket area, this can take quite a while.
Chopping takes things in the opposite direction: You set your quill stop so you can't cut too deep, move to the middle of the pocket, and for the first pass you pull down on the quill handle while moving one axis back and forth to give the chips somewhere to go, and to reduce forces on the cutting edge. But basically you're drilling a rough hole with an end mill. Retract the quill. Move over about 1/8" in one direction and pull down again, moving slowly back the way you came. This cuts a tapered wall, eating out about 1/8" of metal in that direction. Retract the quill, move over another 1/8" in that direction, pull down again, etc. Keep doing this until the cavity is mostly eaten out. Oddly enough on the same machine, same end mill, etc. this technique moves a lot faster.
"Sounds like chain drilling!" Yes, but it's not. For starters, it doesn't use a drill. (A drill, by the way, is still one of the most efficient ways to remove metal with a machine, which is why people use chain drilling to do pockets.) More importantly, chain drilling leaves lots and lots of thick/thin/thick/thin transitions that you then have to pass an end mill through. Want to talk about breaking end mills? Chain drilling to any appreciable depth is a great way to break end mills when you go back to make the cleanup pass. It's interrupted cutting at its worst.
Oddly enough, chopping seems to like a heavy cut. When you step over to start the next line of chops, you want to move over almost the entire width of the end mill. Contrast this with contouring where a 45% diameter step-over distance is typically a good number to use. Chopping really does go fast. And when you're done chopping out a cavity, it's clean. You may have some light scalloping on the walls, but the bottom is flat, the sides are straight (you do a straight plunge at the end of a line of chops), and things are generally really clean. A quick pass around the walls to clean things up, and you're ready for your finishing pass(es).
So how'd I manage to bust a half inch end mill? Simple: I didn't lock my axes. When you're chopping, the table really likes to move around. Lock the axis you're not stepping in. This keeps the end mill from pulling the table around in that direction. I failed to do this, so my end mill threw the table sideways by whatever backlash I have, and when it rotated 90 degrees so the next cutting edge engaged the material, it had now moved substantially, so all of a sudden the cutting force went up by a lot. SNAP!
I swore, I cursed, I flipped the end mill around (it was a double-ended one), touched back off the top of the part, and re-set my quill stop. I then locked my free axis before starting again, and had no more incidents. The cavity was cleaned out, and the rest of the work on the part began.
Like a lot of machining techniques, this probably won't make any sense without a diagram and preferably a video. I'm not up to shooting a video at the moment, but I hope this description at least gives someone an idea of what chopping is about. And don't forget to lock your free axis so you don't break end mills!
Tom
Sunday, March 2, 2008
Box Camera (Take II.5)
The box camera is coming along a lot faster than I thought, and probably far better than I deserve. I do have one major light leak: the front of the camera is see-through! But fixing this is just a matter of repeated painting of the inside of the box, so it's not a show-stopper.
The Super 77 let me finish the back end of the camera, which turned out really really well. I had one scare where I hadn't checked the fit of a part before gluing it into place. It was too wide, and the film holder wouldn't sit flush. This meant light leaks and a non-planar film holder. DOH! Some quick work with an X-Acto knife and sandpaper, and everything was back in order.
I'm on my third coat of tung oil. I should be able to get one more coat in today. If I can get another two tomorrow, I'll probably call it quits. My Bender 4x5 has seven coats, but it's made out of cherry. This is made out of, "Hey, look, I got this box at Ace Hardware in the crafts section!" I know it'll never look as good. six coats should be plenty.
I chickened out on the suspension bracket. I was going to do it as a multi-piece assembly with lots of screws and glue, so I could maintain the whole wood camera look. But visions of having a screw fail or a glue joint fall apart with the camera four hundred feet in the air disabused me of that notion. I don't have a lot invested in the camera, but the Fujinon 150mm lens is another story. That's the best 4x5 lens I've got!
In any case the camera body itself should be ready to use some time in the middle of the week. I need to make a servo-driven cable release so the thing can actually be triggered remotely, but that's a normal machining problem. I'm not worried.
I can't wait to fly this thing. I took four more 4x5 pictures this weekend: hibiscus, praying mantis, a false sandalwood leaf, and a tree growing out of a rotting log. I'll see how they come out tonight when I can get the bathroom dark enough to develop. But I really can't wait to see what an aerial looks like!
Tom
Saturday, March 1, 2008
Trees and Boxes
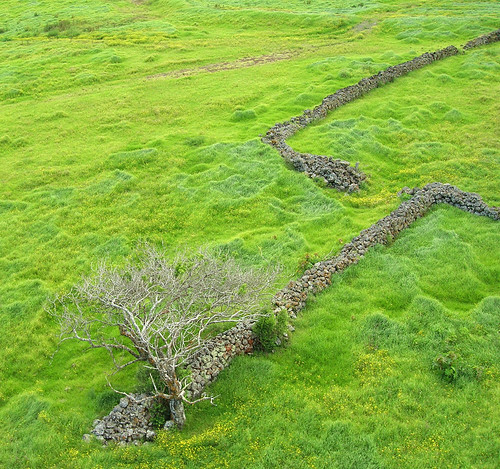
I finally got to fly my kites Friday at lunch, and got what I hope is a decent picture of this tree. Since it's less than a ten minute walk from my work, it's a subject I've photographed dozens of times, usually with less than favorable results. This time I think I bagged it. The light was a little too soft for my taste, but the angle works. Unfortunately the very weather that gives me a line angle to get this shot is the same one that makes the clouds that killed my light. So I don't know if I can really get this in better lighting. Ah well, c'est la vie.
On another note I started work on the 4x5 box camera. The box from the hardware store is easy to cut and sand, and the lensboard end is more or less finished. I still need to add the t-nuts and anchor points for the lens board clamps, but the hole and baffles are done.
The film holder end is another story. I got everything laid out in CAD, printed the drawings 1:1, and found out my can of Super 77 adhesive is kaput. So I need to pick up new glue before I can cut out the parts. Cutting them is no problem. I've been making the lensboard parts on the scroll saw all morning. But without the glue I can't stick the drawings on, so I can't get their shapes cut out. Ah well, c'est la vie.
I still think I can finish the woodworking for the camera this weekend. Painting the inside and the light traps should be pretty quick, too. But I'd like to take a few days to get the finish on the outside just right. Hey, it is a wooden large format camera. I have to at least try to make it look good!
But the real test will be a landscape ground shot from a tripod. So it'll have a traditional 1/4-20" tripod socket stuck in the bottom of the camera. That's the only way I can get the lens really dialed in and at good focus. Besides, if I make it right it should actually be a pretty pleasant camera to use for field work as well as for KAP. But there's no provision for focus at all once the lens is set. It's strictly for long-distance shooting unless I make a set of spacers for it.
I'm excited. I just hope I can characterize it in time for the archaeology trip!
Tom
Subscribe to:
Posts (Atom)