Monday, April 28, 2008

A Light Box

Canon 50mm f/1.4


On Saturday I built a light box using the instructions on the Strobist Blog. It turned out really well, as you can see! It turns out I had all the bits and pieces at home already, so I sat down with a cardboard box, three sheets of tracing paper, some tape, a box cutter, and some poster board, and in about ten minutes I had a light box for small studio work.

It's not the end-all be-all of studio lighting solutions, but it's actually pretty darned good for what it does. For example, there's not much provision for cutting down on the light at the back of the scoop (a fade-to-black technique that makes the subject look like it's standing on an infinitely large flat plane), but you really can control the light well by shadowing each of the side panels with other pieces of poster board, or by turning the box so the ambient light strikes it differently.

I also found out you can get highlights on reflective objects by bringing a small point source close to one of the side panels on the box. I used an LED flashlight, but a small incandescent flashlight would work as well, and would offer better color matching for shots done indoors using tungsten lights.

The instructions do mention that you don't really need to use strobes to make the thing work. Ambient works great, especially with black and white (which doesn't care as much about light color) or digital (where you can white-balance out nearly any lighting situation). So far I haven't used a strobe with my box, and don't really plan to. It works great just the way it is.

If you do product photography for a place like Etsy, or if you run your own site and need to photograph your wares, this really is an inexpensive alternative to some otherwise hideously expensive approaches. I took this picture with a digital SLR, but it would've worked just as well for a point and shoot with some marginal macro capabilities an some sort of stabilization (tripod, beanbag, chair back, or just a really steady hand.) It works!

Tom

Sunday, April 27, 2008

Work in Progress

Items #3, #4, and #7 are done, but I haven't had a chance to fly the camera since making the changes. Unfortunately I'm going off-island for a week, and won't have a chance to test it until I get back. C'est la vie.

The trade winds picked back up, so I got a good chance to test the new suspension. It's gust-prone, but any lightweight camera with a big cross-section would be. I did some tests, and illustrated the need of some sort of weathervane on the rig. I'm thinking a KAP Feather is likely my best bet. I can't afford one right now, so that will have to wait.

I probably won't have a chance to chrono the lens shutter or do a resolution test until I get back. Both of these require a semi-elaborate setup in the lab, and I'm simply not set up for it right now. The chrono will also require some development with an Orangutan since I don't have a shutter chrono built out at the moment. But it should be a pretty straightforward project.

Re-designing the pivots and adding the second set of holes on the camera box for vertical shots will have to wait. For the moment I'll add some lock washers to each axis to facilitate brakes, and verticals will just come later.

But for the moment I think I have a massive improvement on my earlier camera, and just need a photogenic subject, good solid winds, and a break from the incessant vog that's been clouding up the landscape.

Tom

Wednesday, April 23, 2008

4x5 KAP - Plans for the Future


Pololu Valley - 4x5 KAP

It really does work. Of the four pictures I took in Pololu Valley, this one worked the best. But it's not without its flaws.

The good news is at 2400 DPI, this is a 12,000 x 9,600 pixel image, or the rough equivalent of a 110 megapixel camera. So there's a clear advantage to using the thing. I'm not just doing it to be "retro".

The bad news is at the full 2400 DPI scan, the image starts to go a little soft. And so the planning starts:

  • Item #1 - Test my lens against a USAF resolution target to find out what aperture setting gets me the most resolution. What's my lens's sweet spot?
Also, the negative was slightly over-exposed. I've tested this camera for light leaks, and because it's uniformly over-exposed, I don't think this is from fogging of the film from a leak. I know this shutter tends to run long, but I've never stuck it on a chronograph. Time to do so.

  • Item #2 - Chronograph my shutter, make a new label for the lens board with the real open/close times for each setting, laminate it, and stick it on.
Ok, the obvious one: It's tilted. The Picavet suspension on this camera uses eyebolts rather than pulleys. The suspension lines have a fair bit of drag on them where they pass through the eyebolts, and it appears it's enough to let the camera hang at some oddball angles. The angle with respect to the horizon is 13.6 degrees, give or take. Not cool.

  • Item #3 - Replace the eyebolts on the Picavet with ball-bearing pulleys. I have sheaves and bearings in-hand, so this is a matter of making blocks.
Also, I'm beginning to see the advantage of the smaller Picavet, not just for reasons of portability. Smaller Picavet crosses exert more of a righting force on the rig for less friction on the lines. James Gentles has done the most extensive testing on Picavet geometry of anyone I know, so I have a roadmap to follow.

  • Item #4 - Re-build the Picavet to use the Gent-X geometry developed by James Gentles, and put into production by Brooks Leffler.
Next, my mechanics for aiming the camera aren't what I'd like them to be. I'd like to re-design the pivots to be hard axles with separate brake mechanisms for each. This will allow for more clamping force without necessarily ripping threads out.

  • Item #5 - Re-design all the rig's pivots to have positive braking mechanisms, and to have rigid axles.
Finally, the last time I took this picture it was a vertical panorama using my digital rig. I think of this angle of Pololu Valley as a vertical. Shame I didn't design in any provision for rotating the film 90 degrees so I could do verticals! Luckily the fix is pretty easy.

  • Item #6 - Add a second set of bracket holes so the entire camera box can be rotated 90 degrees for vertical shots.
There is one left-over from the initial design that I never dealt with: When you pull the dark slide out of a 4x5 film holder, felt light traps are supposed to keep light from leaking into the camera through the dark slide slot. But felt wears out, light gets in, film gets fogged. So it's only prudent when using a 4x5 camera to hold your hat, your hand, or the dark slide itself over the slot in the film holder to keep direct sunlight off of it. You can't do this when your camera is three hundred feet in the air over your head!

  • Item #7 - Install Velcro strips on the camera body, and make a dark cloth that can be tacked over the exposed edge of the film holder prior to flight. This is a ten minute job on a sewing machine.
In any case the camera is good enough to be used as-is. But I'm pretty driven to get all these items taken care of as quickly as possible. In the meanwhile it's time to go through all my KAP trips, and to see what subjects really lend themselves to a large format picture. Right now I only have Tmax 100 film available, so all my 4x5 KAP shots will necessarily be black and white. But Fuji Velvia and Kodak Portra VC are two outstanding color films available in 4x5 format, so once the bugs are worked out with Tmax and the camera is flying clean and steady, I will start shooting color as well.

Tom

Tuesday, April 22, 2008

Permission and Success!

I got permission from the folks at the Gemini Observatory to use one of my aerial photos of Gemini North commercially. Rights extend only as far as selling individual prints, and there's a stipulation that the image not be used to endorse any product, or for commercial licensing. But hey, I got to list a print of Gemini North on Etsy! I'm stoked. (Big BIG mahalos to the Gemini folks!)

I also had a really successful 4x5 KAP trip to Pololu Valley. Not all the pictures came out, unfortunately, and at one point I thought I was taking a picture of the beach and actually took a face-on picture of the cliff instead. DOH!

But some of the pictures did come out. There was severe tilt in one of them, though, to the tune of about 14.5 degrees. So I'm going to have to bail on the eye bolts I'm currently using on the 4x5 KAP Picavet in favor of building out some honest-to-goodness ball bearing pulleys. I've got the pulleys in-hand (salvaged from a Tektronix plotter of yesteryear) and just need to make the pulley blocks. It's about a two hour job on the mill at work, so I'll probably do it there rather than at home.

Things seem to have slowed WAY way down on Etsy, so I may re-list a bunch of stuff after I get the shots from Pololu worked out. Maybe that's not the best venue for what I'm doing. I did hand out two business cards when I was down in Pololu, but I think it's time to put together a portfolio and try some of the shops in town.

Speaking of Pololu, Jan sent me a new Baby-Orangutan, one that uses a much higher capacity and lower-loss H-bridge chip than the original. It's also wired up like the 168-LV, so hardware PWM can be used in both directions with or without braking. It's a HUGE move forward for micro robots. I'm going to try to get Ben's 168-LV motor code rolled into the library this week.

I also approached Jan about building an AVR-only board with all the I/O pins brought out to 3-pin headers. This would be great for AutoKAP controllers, for sensor filters (like Billy's massive Kalman filter for his 6DOF+GPS+Compass system), for the ThereminVisionII system... the list really goes on and on. Heck, I'd order two right now!

And finally, Jan got new gear motors in. One of them looks like it'd be well-suited to mini-sumo, and should triple the robot's speed over a conventional servo-based mini-sumo while losing none of the pushing ability. So that project is going to start ramping up in the near future.

So this may be one of my last photography-only posts for a while. Other irons in the fire just got hot, and it's time to get back to the other parts of The Tiny Machine Shop.

Tom

Sunday, April 20, 2008

Large Format KAP - Not There Yet

I'm getting closer to doing large format KAP, but I'm not there yet. It was a good weekend, nonetheless.

After my last 4x5 KAP experiment, I tried adding what I thought was a stabilization system similar to what George Lawrence used for his famous picture of San Francisco after the 1906 earthquake. But after watching a video of Henry Jebe setting up and attempting to launch his scale replica of Lawrence's camera, I realize my own design fell far, far short of the mark. Lawrence's design was a rigid tripod while mine was a tensive system using #150 line and carbon fiber spars. Essentially mine was a traditional Picavet with 24" of steel pendulum, surrounded by this carbon fiber and Dacron structure, with a camera somewhere in the middle.

The fun part was testing it. I realized I could fly the thing 'till I was blue in the face, and never quite understand what it was doing. So instead I found some good, high branches in the trees outside, and rigged it up to them. After watching it for a while I set up my digital KAP rig in the tree as well so I could compare the two. The digital rig, a standard BBKK kit with pan gear reduction and PeKaBe blocks, was almost rock solid in gusty, 30 knot winds. The 4x5 camera? Holy cow, it wobbled all over the place.

The interesting thing was that the whole structure served to put the bulk of the energy in the system into a very slow side-to-side oscillation. Most of the high-frequency oscillations damped, but that low-frequency oscillation just kept getting worse.

So I started taking things off. Taking off the suspended weight brought back the high frequency oscillations from the less-than-rigid pendulum, but damped down the low-frequency oscillation. Removing the spreaders and top lines got rid of most of the rest of the low-frequency oscillations, but made the higher-frequency oscillations even worse.

With just the Picavet and the 24" pendulum, it was clear the pendulum was letting the camera oscillate all over the place, but the Picavet sat rock solid the whole time. So I took out the long steel pendulum.

With the camera bolted straight to the Picavet, it behaved almost exactly like the digital KAP rig. No surprise, considering they were essentially identical at that point, from a physics standpoint. But it's encouraging because it means it's as good as I can get it. Not much in the way of oscillation, even in a gust, and what oscillations I did get were quickly damped.

So now there's nothing left to do but fly. I have Monday off from work, and plan to go somewhere photogenic and expose at least six sheets of film. The problem is the best place for black and white KAP is probably Whittington Beach or South Point... a full four hours from here. It's a drive I'm not sure I'm ready to make. Granted, I've been wanting to do KAP at South Point for months. I did some limited KAP back in October, but didn't get to fly at the Plastic Beach (a beach where the bulk of the sea trash tends to wash up) and at Green Sand Beach (a beach whose sand is almost entirely composed of olivine crystals.) Given the choice, I'd fly at both those places, and capture the rough surf of South Point with digital KAP.

The problem is the winds at South Point can be truly hellish. In October of last year the wind was blowing 26 knots. I flew on a Flowform 8, and worried at every point that I was going to lose kite, rig, the whole shebang. I really don't like flying in wind that high. Whittington, just around the corner, was blowing 15 knot winds, which are much more flyable. Whittington is also as photogenic as a rocky beach can get, and has yielded some of my best surf images to date.

I'll wait to see what the wind models predict in the morning. If the wind is going to be too high, I'll give it a miss. But I hope it works out. Ever since Scott Haefner took pictures of the old South Point windmills, I've wanted to make another trip down there. Maybe it will work out after all.

Tom

Wednesday, April 16, 2008

A Sale and A Change

I made my first sale!! I'm stoked! It was the honu picture. So I opened my browser, went to the printer I spent so many hours loading my pictures into, and...

They changed their shipping policies so they only ship FedEx. $30 to ship a $10 print. USPS charges $4.60 to ship that same print. ARGH!!!

I wound up getting the print made at Mpix instead. Which, I think, turns out to be a good thing, even though it meant massive changes to my Etsy listings.

For starters, Mpix uses laser photo printers. They don't lay down toner or dyes or jets of pigment, they actually use lasers to expose photographic paper. So the media is a lot closer to what I'm used to. The color paper is a Kodak color print paper, and their B&W prints are done on an Ilford paper. (I've been a big fan of Ilford papers since 1995!)

Another advantage is that they use the USPS to ship, and lo and behold their shipping cost, Priority Mail, mind you, is $4.90. GREAT! This wins them over with me more than anything else.

The Honu print is coming here before I ship it out because I need to see what the print quality is like, and how well they do with color. But in the meanwhile I re-did all my listings, re-cropped and re-sized all my images, and got everything re-cranked for printing through Mpix. I'm looking forward to seeing that turtle!

Tom

Sunday, April 13, 2008

Kalapana at Sunset

It worked! Saturday I went back to Kalapana and had hours of time to fly. Pity my transmitter wasn't completely charged. Nonetheless I had my kite in the air for about two hours, once around 4pm and the other near sunset. KAP worked out great!

I also did two 4x5 pictures, one at 8-seconds and the other at 1/15 second. I plan to develop film tonight, so I should be able to see how those work out. Unfortunately I couldn't find my 30x focusing loupe, so there's a reasonable chance the negatives won't be usable.

Parenthetically, I really thought I'd lost my 30x loupe. I searched everywhere, or so I thought. This came right after changing to a new camera bag for my 4x5 (my old KAP bag), so when I got home I even rooted through the trash, pulled out the old, disintegrating bag, and searched it at midnight when we got home. No dice. So I ordered a new one online. $55. OUCH! Not four hours later I reached for a yellow Wratten filter, and lo and behold I'd crammed my loupe into the wrong pocket of my photo vest... the only pocket I hadn't searched. I need to get up at 4am tomorrow to cancel my order before they ship it! Loupe restored!

The next morning I got to start really pawing through the pictures. One even supported panorama stitching, and holds enough detail to print roughly 32" x 13" without pixellation. Yaaay! It went up on my Etsy page as an un-matted print.

The flight itself was pretty funny. The folks at Kalapana remembered me from last week, so when I told them Scott gave me permission to fly, and what the conditions were, they were happy. One of the DLNR guys made sure I understood that if my kite went down past the barrier, it was gone. I assured him I understood, and would take the warning to heart.

But other than that things were incredibly smooth. The air cleaned up around 220' out with a Flowform 16, and after sun-down the air was so stable it was like having an airborne tripod.

Unfortunately I didn't do a single AuRiCo launch. I got the new chip from Peter Engels and Brooks Leffler, but like a dork I didn't print out my new reference card to go with the new firmware, so I had no idea what the switches did. I kept getting cross-talk between two of my servos, which I remember I solved last time by reading the reference tables. Ah well, my mistake for not testing my gear prior to heading out.

In any case, Kalapana was a wonderful photo outing. The folks out there were fantastic, the shots came back with enough good ones to put a smile on my face, and I even got a new one to post to Etsy. No damage to my gear, and I got my 30x loupe back. Can't beat it!

Life is good.

Tom


Saturday, April 12, 2008

Selling on Etsy - Item N in a Series

Based on input from a number of forum threads and individual critiques, I think I've re-vamped my Etsy shop about ten times. The most recent step is to start marketing locally. I can feel my shyness generators cranking up to 100% throttle!

I stopped in the coffee shop to get coffee (we're out at home) and pastries for the kids (it's their "We did all our homework this week" bribe/treat), and saw some pictures on the wall. Turns out they were done by Pablo McLoud, someone I've run into at work on numerous occasions. Aha! So there is a local market! Time to talk to Pablo!

In any case yet another thread discussed getting business cards printed, and handing them out wherever you go. I'm not to that point yet, and can't really see myself handing a business card to Alice when I'm ordering lunch. But there are a number of notice boards in town people post cards on, and I can't even count the number of people who have come up to me while I'm flying my camera to ask if I have prints for sale. Well now I do!

So I made a first-pass at a card graphic and printed up eight of them on a sheet. Not great, but with the trip to Kalapana happening later today, I figured it was the easiest way to give the business card idea a try:


If I run out of cards I'll get a set ordered from VistaPrint.

What to put on the card took a bit of thought. I like the way I operate right now: fly where I want when I want, take what pictures I want. I tried a couple of attempts at contract photography, and I've still got one I owe a guy. I can't even pull it off as an aerial because of the power lines and buildings in the area, so I'm going to have to do it by putting a tripod on top of my Jeep! Not wokring out well.

So there's no phone number, no e-mail address, just a shop name, my name, explanation, and my Etsy URL. Again, I'll see how it goes today at Kalapana to see if people react negatively to that. But hey, what I want is to direct them to my Etsy shop, not give them my full contact information. So we'll see.

It's funny, I've been doing photography for over twelve years, and every time selling has come up I've been afraid to. I tried to do a small gallery show, and wound up blowing hundreds on prints that never sold. I guess that soured me to the whole idea. I think also just knowing how much marketing it takes to be successful also scared me off. Guess I'm not as scared any more. But the learning curve is still steep, the potential for loss is still very high, and I was right in one regard: I have no clue what I'm doing. But I'm learning fast.

Tom

Thursday, April 10, 2008

Weekend Plans

I went through the 4x5 shots from Halema`uma`u and Kalapana. No dice. One from Halema`uma`u was a dead loss. Massively under-exposed. The other two had so much difference between sky and ground they were essentially un-printable.

But!

The wind, which had gone all wonky earlier in the week, seems to have settled down again to a good pattern of tradewinds. That means clean winds blowing in from the back and out across the lava at Kalapana. So if things stay steady we're all heading out on Saturday to see the lava flow.

Plans this time:

4x5 - Red filter to bump contrast, and a 2.0 split-ND filter between sky and ground to balance things out more. I need to get the whole scene within eight stops or the printing really can't catch everything. I know B&W film can see ten stops of dynamic range, but my scanner can't. I think I can get some good shots of the lava flows, especially given the long exposures I did the last time I was out. I plan to shoot a range of shutter speeds, adjusting the aperture to compensate.

KAP - I have standing permission to fly from Scott with the County Civil Defense. I want to arrive early enough in the day to get a kite up, fly my rig under radio, and take a chip-worth of shots. (Sorry, no AuRiCo this time unless I fill up one chip and swap to a second.) By golly I want some airborne pictures over the lava flows!

I really really hope this goes a long way toward proving to the NP rangers that I can safely operate my gear around other people, and that the risk of a downed rig is minimal. (You can tell I want permission to fly in Volcanoes National Park...)

I'm excited! I've got some time in the morning since we can't head out until 1pm Saturday, so I might be able to take in a beach, too. Maybe replicate the stained glass water shot with better altitude this time? Who knows. In any case I'm looking forward to it.

Another photo session I need to plan is a rocky beach 4x5 morning. I'd like to start before dawn so I can get set up for a milky water long-exposure shot. Probably mix 4x5 and digital, and run two tripods. I just need to pick a good beach that's not locked at 4am.

Ok, I give. I really am nuts. The great thing is, as far as obsessions go this one's at least marginally socially acceptable. Not as acceptable as football, but enough people tote cameras around I can almost pass for normal. Sort of.

Tom

Wednesday, April 9, 2008

Imagemagick, Etsy, and a Return to Framing


So I got feedback from the first round of critiques. One suggestion was to change my avatar to something indicating the kind of work I'm selling. So I changed it from a picture of me (what I'd read in another critique thread: show yourself) to an aerial. Following some of the KAP threads, I used a straight-down shot from Kekaha Kai with a palm tree shadow. Hope that indicates aerial. Given that avatars are 75x75 thumbnails, it was actually tough to find one that held enough detail at that size. The palm tree shadow works, though.


Another suggestion was to show what my pictures would look like matted and framed. The person offering this critique acknowledged I was only selling raw prints without matting or framing, but said including an image like that would help the buyer to imagine what the artwork would look like on the wall.

Ok, ok, to be fair they said I should photograph matted and framed artwork on my wall so the buyer could see what it would look like. Considering I've never printed my stuff this large before, it was a little hard to do. But hey, I've been a framer so I remember the sizes of the materials. Mat boards are 0.052" to 0.060" thick, or about 1/16". Check. Nielsen metal frames are roughly 9/16" at the face. Check. I know the print size of my pictures and a good rule of thumb for mat width (about 1/5 of the longest axis on the print is a good starting point), so I know about how big things will be.

Time for Imagemagick!

In case you haven't run across this utility yet, it's a set of tools, typically for UNIX, that allows you to manipulate images using command line pipes. Best danged idea anyone in image processing ever came up with. Once you find a formula that works, it's trivial to apply it to a whole string of images. Interestingly enough, digital darkroom tools have finally caught up with this idea. Adobe Lightroom lets you work out a whole set of manipulations for a single image on a given shoot, and then apply those changes to the remaining images from the shoot. Magic! Well, except that Imagemagick has been doing this for a long long time now.

So I made a script that would frame a picture. It checks if it's color or black and white, and sets the mat tonality based on that. (I really want it to pick the one, two, or three most prominent colors and do a single, double, or triple layer mat using standard Crescent color choices, but...) Next it takes what you tell it to be the largest dimension, in inches, and generates a scaling factor for all the remaining steps. Finally it cranks out a mat using the 1/5 rule, generates a frame border to scale, and saves it.

You can see what it looks like in the two pictures I've included. Right now it's a one-run-per-image script, but I plan to set it up for wildcards next. It shouldn't be too hard.

So I went back, added a quick paragraph indicating the second picture for each listing was an example of what each shot would look like, framed and matted, and then added the frame&mat shot.

Aaaaaand... we'll see. I hope the second round of critiques hit my listings after these changes were made. I'd like to get feedback on them.

Tom

Tuesday, April 8, 2008

Selling on Etsy

I set up an Etsy shop late last week, just before packing up to go to Kalapana for the KAP trip that wasn't. It's... being an interesting experience.

On the one hand, it was encouraging to see more hits per photo on Etsy than I ever saw on Imagekind. I think Imagekind is a little full, and out here at any rate the response on the web site is a little slow. My pictures do show up on some searches, but the whole place is full of photographers. It helps that the number of photographers on Etsy is limited. Plus, I get the feeling no one else is doing aerials. At least not low-altitude aerials. Certainly not from a kite.

My shop has been open five days and a couple of people have marked my store. One person even marked a particular print. But no, no one has bought anything. I can't complain. No one has bought anything off of my Imagekind gallery, either. So fair's fair.

I'm still trying to figure out just how to market my photography. The only almost-sale I've had, a face-to-face, involved a buyer wanting a picture to be enlarged beyond what the image's resolution could support. Which just killed me, because I really wanted to make the sale, but I really didn't want to hand over a heavily pixelated picture, either. It was a no-sale with a promise to try to re-shoot a particular feature at a particular time of day with a particular tide level, which all requires a particular kind of wind and fifteen extra feet of tail on the kite. So no, not likely to get that sale any time soon.

But because of that experience my first two items were 4x5 ground photographs, printed on stretched canvas, at sizes large enough to please that first almost-customer. But that also meant my first items listed were $150 and $350. I hope I didn't scare people off before things even got going. On the other hand, I hope it also indicates I really can print that large from a 4x5 negative.

I went ahead and posted my shop for some critiques. I really am trying to get my t's crossed and my i's dotted. (Or is it the other way 'round?) Anyway, I'll give it a go. Time will tell if this is a good move.

Tom

Monday, April 7, 2008

The KAP Shoot That Wasn't


Milky Lava


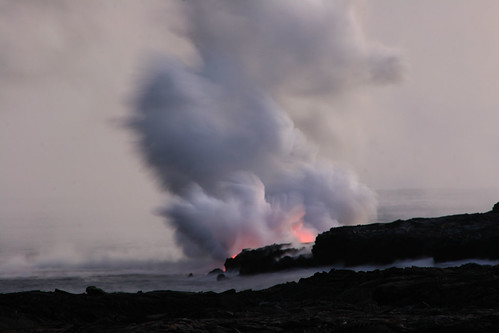
Ok, so I didn't get even half the shots I was after. I did take two 4x5 shots of Halema`uma`u from Volcanoes NP, but I haven't developed them. The air was so thick with volcanic gases it was difficult to breathe, much less take decent photos. But one nice thing with film vs. digital is that it's always possible to get more contrast out of a negative. Sometimes analog really is good. In this case I metered off the sky and set things up so it should be rendered 18% gray. That gives me the most latitude for rendering texture in the sky to bring out the plume.

I also got a 4x5 shot of the lava flowing into the sea at Kalapana. That is also not developed yet. I've got some concerns about metering, but with any luck it should also hold enough sky detail to get good contrast. The color digital shots I took had plenty of contrast in the sky, so I've got hope.

It's odd, I didn't think the lava flows would make good subjects for B&W photography, but except for the orange glow from the lava everything was shades of gray to begin with. So if the exposure came out at all, it should be a usable shot.

But the real story for me was the KAP at Kalapana, or rather the lack thereof. While my friends from work were happily using some of the best light I've ever seen on that coastline, I was madly running around with my KAP bag on my back trying to find the person I should ask to get permission to fly a kite. I asked the rangers who were volunteering at the viewing area, but as they pointed out they were volunteers and had no real jurisdiction. I asked the police who were out there, but they were there to insure human safety and didn't want to make that call. I even asked some guys who turned out to be from the forestry service, but they were volunteering to help with parking. In the end I wound up driving all the way back out to the County Civil Defense Command Post, some 2.5 miles from the end of the road. There I talked to some really nice folks, including a guy named Scott. Scott was the guy to talk to.

The upshot is that Scott's primary concern was safety, and minimizing risk of life and limb. In the end he gave me permission to fly, granted that I wasn't putting anyone at risk (no gear over people's heads) and that I understood recovery options for downed gear would be limited (if the folks at the viewing area said no, the answer was no.) Since I fly my rig over water a lot of the time, and since recovery options for a water landing are practically zero, I felt fine agreeing to those terms.

So I raced back to the viewing area, only to find the wind had died and the light was gone. ARGH!

But there's a good post-script to this story: On the way out I stopped to talk to Scott again, and told him I didn't get to fly my camera. I wanted to make sure the permission was a standing offer kind of thing and not a one-shot kind of thing. I told him I wanted to come back, and he was very enthusiastic. He closed by telling me to keep the dream alive. If that's not encouragement, I don't know what is!

We got home at almost 11pm at night, so I didn't even unpack my Jeep. I wanted to go back the next day, but life got in the way and most of Sunday was spent doing surveying and drafting. Not my favorite activity. But my daughter, who was utterly disappointed at not getting to go to Kalapana, gave me a date: We're going back next Saturday. I have permission to fly, I'll have time to test the changes to my rig (pan axis gear reduction and a new AuRiCo controller), and we'll get to show up a little earlier so I've got more time to get things ready and airborne.

In addition to getting some good aerial shots of the lava, my goal is to demonstrate my own willingness to work with people, the safety of my gear, and the effectiveness of a camera suspended from a kite. Since there are national park rangers volunteering at the observation area, my real hope is that they will then take word of this back to the park, and eventually I might get permission to fly my rig inside the park boundaries. There are so many places in the park where a low-altitude aerial would be my vantage point of choice, I can't even list them all. This is a door I'd like to see opened, not just for myself, but for other KAPers as well.

So despite the disappointments, it was a really good weekend. Besides, I had four keepers from the shots I did with the 20D. Getting even one keeper from a trip, much less a trip with some major technical hurdles, is good. Getting four? Almost unheard-of. Can't wait to go back!

Tom

Thursday, April 3, 2008

Into the Thick

One of the guys at work, a fellow photographer, is setting up a trip to visit the volcanically active side of the island. Stops he's got planned include: Hilo, to see the Merrie Monarch Festival Parade (YAAAAY!), Halema`uma`u crater to view the mile-high gas, ash, and steam plume billowing out of the crater, and a hike out to the active lava flows on the Kalapana side. It's open to any and all, including kids. I'm planning to go.

But what gear to bring, and what kind of photography to anticipate? THAT is the tough question. I'd like to bring KAP, PAP (my 16' pole), and 4x5 gear at the very least. But can I also pack DSLR gear and not be over-stretching myself? Last time I tried something that involved I compromised my ability to move around. And considering my car doesn't lock, if I can't carry it I really can't bring it. At least as far as camera gear goes.

4x5 shots I'd like to get:

  1. Kilauea and Halema`uma`u craters from Volcano House or Steaming Bluffs (which is about as close as you can get right now). 4x5, TMax 100, Wratten #25, circular polarizer, split ND.
  2. Kalapana close-up lava shot (this really needs to be color, and I don't have any color 4x5 film!)
  3. Any and all rainforest action at Volcano NP.

KAP shots I'd like to get:

Strictly speaking, kites are not allowed inside the park. But I'm planning to bring the gear anyway, bring a portfolio of KAP shots I've done, and ask the rangers who are present at the viewing area. If they say yes, I'm flying. If not, no sweat. I can understand their reservations.

  1. Steaming Bluffs / Sulfur Banks (looking back at the cliffsides)
  2. Volcano House, preferably with the kite hanging out over the crater edge, looking back at the cliffside
  3. Jaeger Museum and Volcanoes Observatory, from as close as I can get
  4. Kilauea and Halema`uma`u Crater
  5. I'd love to do a fishbowl AuRiCo pano from the Kilauea crater floor, but my guess is that's strictly forbidden at the moment.
  6. The entire walk from the parking area on the Kalapana side to the lava viewing area, done as an AuRiCo series
  7. Lava at sunset on the Kalapana side
Now whether I'll get to exercise my madness to the full extent remains to be seen, and also depends on whether the 1.31b PIC for the AuRiCo arrives tomorrow. If not, it'll all have to be manual radio operation.

Hoping for some good pictures!!

Tom

Tuesday, April 1, 2008

Intrusive Visuals

A recent post to the Utata group on Flickr included a pointer to a collection of photographs of people just before and just after they passed away. Judging from the replies the collection was very thoughtfully done, and did more to reflect the inner strength of people than to focus on any sort of morbidity.

Still, I appreciate that the collection was posted as a link rather than as thumbnails. If you haven't already gathered from reading other posts here, in addition to TS I also have OCD. The flavor mine takes is primarily intrusive visuals, usually disturbing, and utterly impossible to block out. While I was in college a fellow student found out about this and took immense delight in showing me random pictures from coroner's textbooks, crime scenes, etc. Once the images were in my mind, it took weeks to get them out. They would surface at the strangest of times: during class, late at night, while talking with a friend. It was devastating. I don't think they ever really came to realize the impact they were having on me. In retrospect, I doubt they would've cared.

I appreciate that a real artist can take a subject, even one as morbid as death itself, and turn it into something truly beautiful and powerful. But I also appreciate that people are sensitive to the fact that not everyone can, or even should look at it.

Tom